
That musty smell in your RV is almost always microbial, mold or mildew feeding on trapped moisture somewhere inside the cabin. The fix starts now: open every vent and window, pull out anything damp, and get air moving. Most surface odors clear within a day or two. If the smell keeps coming back after cleaning, something hidden is still wet, and that’s when this becomes a job for tools and, sometimes, a professional.
TL;DR:
- The musty smell in an RV often originates from hidden moisture and mold, requiring targeted detection beyond surface cleaning.
- Using moisture meters and visual clues to locate concealed wet areas under cushions, behind panels, or around seams is essential for effective remediation.
- Regular dehumidification and thorough drying within 24 to 48 hours are critical in preventing mold reactivation and long-term odor return.
- Deep cleaning should be combined with humidity control, and replacing heavily soaked or moldy cushions is often more cost-effective than repeated cleaning.
- When microbial contamination extends beyond 10 square feet or involves structural cavities, professional remediation with eco-friendly methods is necessary.
Table of Contents
- Fast Fixes: What To Do In The First Hour
- Where Is the Musty Smell Coming From?
- How To Clean Different RV Materials Without Making Things Worse
- Can Your RV’s AC and Vents Spread the Smell?
- What Humidity Level Actually Stops Mold From Coming Back?
- Should You Replace or Keep Cleaning?
- When Is It Time To Call a Professional?
- How Do You Keep the Musty Smell From Coming Back?
- Why Most RV Owners Treat This Backward
- Ready for a Deeper Fix? Here’s What Masterodorremoval Offers
- Sources
Fast Fixes: What To Do In The First Hour
Before you diagnose anything, stop the moisture from spreading and get the air moving. Speed matters here because mold spores multiply fast once they’ve got a food source and standing humidity to work with.
Here’s the order that actually works:
- Open every roof vent and window you have, then park with doors open if weather allows.
- Set up at least two fans for cross-ventilation, one pulling air in, one pushing it out.
- Pull out any wet towels, damp clothing, or soggy floor mats and either launder them or lay them in direct sun.
- Set out shallow bowls of baking soda or activated charcoal in closets and under sinks as a temporary odor sponge.
- Put on gloves and an N95 mask before touching anything with visible fuzzy growth or dark staining.
- Skip the air freshener. Masking sprays just blend a chemical smell with the mildew smell, and it makes the source harder to track down later.
Pro Tip: Sunlight does real work here, not just symbolism. UV exposure and airflow together break down the compounds causing the musty odor, so anything you can safely set outside in direct sun for a few hours is already getting treated.
Where Is the Musty Smell Coming From?
Finding the source beats guessing every time. RV owners who chase the smell around the cabin with air freshener usually miss the one spot that’s actually wet.
Start with the places moisture likes to hide:
- Under the mattress, especially where it touches a slide-out platform or the floor
- Inside cabinets along exterior walls, where condensation forms behind the paneling
- Behind and underneath cushions, particularly on dinette benches
- Under sinks, where slow drain leaks go unnoticed for weeks
- Slide-out seams and roof seams, both common entry points for water
- Around window frames, where old caulking fails quietly
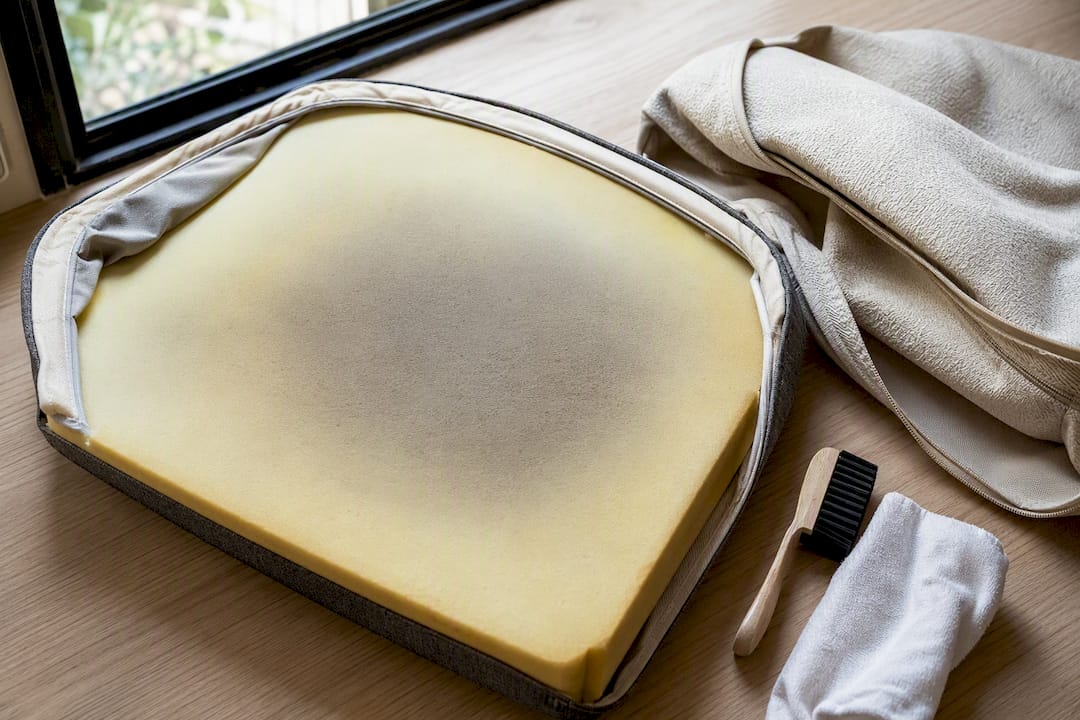
Run a compress test on any cushion or seat back you suspect: press down firmly and hold for a few seconds, then smell the surface right where you pressed. A sharp or sour odor releasing from the compression usually means the smell lives inside the foam, not just on the fabric.
Visual clues matter too. Look for water staining, soft or spongy spots on wood paneling, and any place where the smell noticeably gets stronger as you move closer. Your nose is a decent instrument, but it’s an inconsistent one.
For anything you can’t confirm by sight or smell, a handheld moisture meter tells you what’s actually happening inside a wall or under a floor panel. Readings well above a dry baseline point you toward where to open a panel or pull a cushion for a closer look.
By the numbers: the EPA recommends drying wet materials within 24 to 48 hours and keeping indoor relative humidity under 50 percent. Those two numbers are the entire game when it comes to keeping mold spores dormant instead of active.
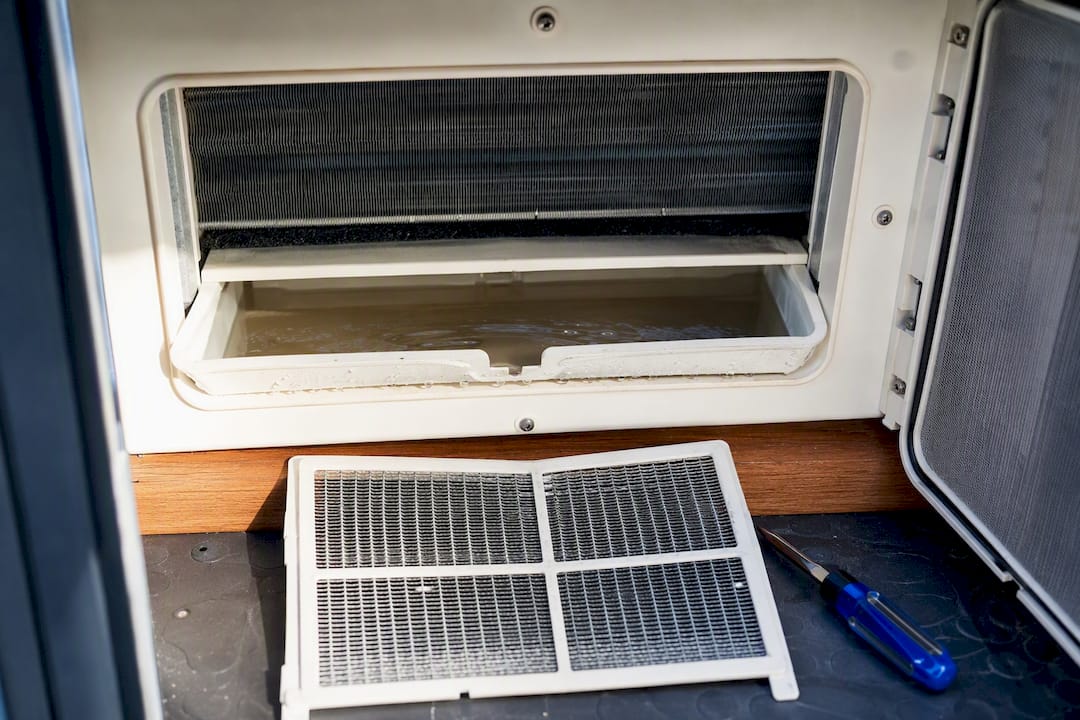
If the smell seems to come from the vents themselves, check the HVAC return air opening, the drip pan underneath the AC unit, and the filter. A dirty filter or standing water in a drip pan is a common, easily fixed culprit.
How To Clean Different RV Materials Without Making Things Worse
Different materials need different treatment, and using the wrong method on the wrong surface either wastes your time or damages something expensive.
Removable cushion covers and curtains
- Check the care label, then wash in the warmest water it allows using an enzymatic detergent, which breaks down the organic matter mildew feeds on rather than just masking it.
- Add a rinse cycle with one cup of white vinegar per gallon of water to neutralize lingering odor compounds.
- Sun-dry fully before putting anything back inside the RV. Do not skip this step even if you’re in a hurry.
Foam cushions and cushion cores
Surface cleaning helps somewhat, but foam is a sponge by design. Once mold has colonized the interior of the foam rather than just the fabric covering it, most surface treatments are cosmetic, they’ll knock down the smell for a week or two before it returns. If a cushion has been sitting wet for more than 48 hours or the compress test reveals a persistent core smell even after cleaning the cover, replacement is the more cost-effective call than repeated deep cleans.
Carpet and fabric upholstery
HEPA-vacuum first to pull loose spores out before you introduce any moisture. Work a baking soda paste into stained or smelly patches and let it sit for a few hours before vacuuming again. Steam cleaning works well for deeper contamination, but only if you can guarantee fast, thorough drying afterward, adding moisture without a drying plan just restarts the problem.
Hard surfaces (countertops, cabinet interiors, walls)
A simple mix of one cup white vinegar per gallon of warm water handles most everyday mildew film. For tougher spots, a mild detergent solution with a scrub brush usually finishes the job. If you go the diluted-bleach route on non-porous surfaces only, use a light solution, ventilate heavily, and never mix bleach with any ammonia-based cleaner.
Avoid ozone generators or high-concentration chemical treatments at home. Practitioners consistently warn that strong DIY chemicals can degrade roofing membranes, fabric backing, and sealants, turning a smell problem into a repair bill.
Pro Tip: Test any cleaning solution on a hidden patch of fabric or wood first. RV interior materials vary wildly in how they react to vinegar, enzymatic cleaners, or diluted bleach, and a ruined cushion cover is a worse outcome than the smell you started with.
Can Your RV’s AC and Vents Spread the Smell?
Yes, and it’s an easy spot to overlook because the smell seems to come from “everywhere” rather than one location. HVAC systems recirculate whatever moisture and spores are sitting in the ductwork, drip pan, or filter, which is why a musty smell sometimes gets worse right when the AC kicks on.
Check these safely on your own:
- The drip pan underneath the roof AC unit for standing water or slimy buildup
- The filter, which should be replaced or cleaned on a regular schedule anyway
- Return-air openings for dust buildup mixed with moisture
- Any visible condensation points around the unit’s base
Power the unit down before touching any of it, then clean the accessible drip pan and swap the filter. That’s the extent of safe DIY work here.
Do not open sealed ductwork, touch internal coils, or attempt anything involving refrigerant. That work requires a licensed HVAC technician, both for safety reasons and because DIY tampering can void your unit’s warranty outright. If cleaning the accessible parts doesn’t kill the smell coming from the vents, the problem is inside the sealed system, and that’s a technician’s job, not yours.
What Humidity Level Actually Stops Mold From Coming Back?
Cleaning removes what’s already there. Moisture control is what keeps it from returning, and this is the step most RV owners skip once the smell fades.
The two numbers to remember: dry anything wet within 24 to 48 hours, and keep interior relative humidity below 50 percent whenever the RV is in use or storage. Mold spores stay dormant below that threshold and become active above it.
Equipment worth having on board or in storage:
- A compact RV-sized dehumidifier for active use, especially in humid climates
- Silica gel or calcium chloride desiccant buckets for off-grid or long-term storage where running a dehumidifier isn’t practical
- A small battery-powered or low-draw fan for winter storage when shore power isn’t available
- Cracked cabinet doors and drawer fronts during storage to keep air circulating around fabric and wood
Storage season matters too. Summer storage in humid regions calls for more aggressive dehumidification, while winter storage in cold, dry climates often just needs consistent airflow to prevent condensation buildup. Check and replace desiccant packs roughly every one to two months depending on your climate, and inspect roof seams and window seals twice a year since that’s where hidden water entry most often starts.
Should You Replace or Keep Cleaning?
At some point, repeated cleaning stops being worth it, and knowing that line saves you money and protects you from a smell that never fully leaves.
Replace rather than clean when:
- Cushion foam or padding has been soaked for an extended period
- The compress test still releases a sour odor after a full cleaning cycle
- Structural wood or plywood underneath feels soft, spongy, or visibly warped
- The smell returns within days of a thorough clean, indicating the source is inside the material itself
Cost varies with cushion size, custom shapes, and whether you handle removal yourself or pay someone to do it, but replacement cushions typically run less than a repeat visit from a remediation service. There’s also a resale angle: a buyer who catches a musty smell during a walkthrough will either walk away or negotiate hard, and no amount of air freshener fixes that impression.
When Is It Time To Call a Professional?
DIY cleaning handles most surface-level mildew smells just fine. But once contamination spreads past roughly 10 square feet or hides inside insulation, wall cavities, or sealed structural spaces, professional remediation becomes the more reliable path.
A professional process typically looks like this:
- Full moisture mapping using meters and thermal detection to find every wet spot, not just the obvious ones
- Targeted cleaning and treatment matched to the specific material affected
- Verification testing after treatment to confirm the odor source is actually gone, not just masked
- A follow-up check to catch anything that resurfaces
Eco-friendly, non-ozone, non-chlorine treatments matter more than most owners realize going in. Ozone and heavy chlorine methods can degrade rubber seals, fabric, and finishes over repeated use, while green-certified methods handle the same contamination without that long-term material risk. Master Odor Removal’s technicians are licensed and trained specifically in these non-ozone protocols.
Before hiring anyone, ask about their license and insurance status, exactly which methods and products they use, what guarantee comes with the service, and how long the job takes from start to finish. A legitimate provider should be able to walk you through a sample report or explain their verification process without hesitation.
Pro Tip: A successful remediation should leave your RV smelling neutral, not floral or chemical. If a provider’s “fix” is a heavy fragrance instead of an actual absence of smell, they’ve masked the problem instead of solving it.
How Do You Keep the Musty Smell From Coming Back?
Prevention is cheaper than every fix above combined, and most of it comes down to a handful of habits repeated consistently.
- Clean and fully dry your RV’s interior before every storage period, no exceptions, even for short gaps between trips.
- Set out fresh desiccants and run a small circulating fan in storage, replacing desiccant packs on a regular schedule.
- Inspect and reseal roof seams and slide-out gaskets roughly every six months, since this is the most common hidden entry point for water.
- Run the bathroom and kitchen vent fans every time you shower or cook, not just when the smell is obviously bad.
- Never store wet gear, towels, or swimsuits inside closed cabinets or under seating.
- Launder bedding and soft furnishings on a regular rotation rather than waiting until they smell.
- Do a quick five-minute inspection every few weeks during active use: check under the mattress, inside the lowest cabinets, and around window seals for any dampness or new staining.
A sturdy roof matters here too; most hidden RV leaks trace back to failed roof seals or flashing rather than dramatic storm damage, so catching a small leak early beats discovering a soaked subfloor months later.
Why Most RV Owners Treat This Backward
Most advice treats mildew smell as a cleaning problem first and a moisture problem second. That order is backward, and it’s why so many RV owners clean the same cabinet three times in one season and wonder why the smell keeps coming back.
Vinegar, baking soda, and enzymatic cleaners genuinely work. They kill what’s growing and neutralize a real portion of the odor. But a combined approach, cleaning paired with actual drying and sustained humidity control, is what separates a smell that stays gone from one that returns every time the weather turns humid. Skip the humidity control step and you’re just resetting the clock on the same infestation.
The other place conventional advice falls short is foam. Owners pour hours into scrubbing a cushion that already has mold established in its core, when a moisture meter reading or a clear compress-test result would have told them in thirty seconds that the cushion needed replacing, not another round of cleaning.
If there’s one thing to prioritize first, it’s the moisture reading, not the cleaning product. Figure out where the water actually is and how long it’s been there before you spend a weekend scrubbing. That single step determines whether you’re looking at an hour of DIY work or a call to a remediation specialist.
— Master
Ready for a Deeper Fix? Here’s What Masterodorremoval Offers
DIY cleaning solves most surface mildew smells, but when the odor keeps returning after you’ve dried everything out and scrubbed every surface twice, that’s a sign the contamination has moved somewhere DIY tools can’t reach. That’s the exact gap Masterodorremoval fills for RV, boat, and vehicle owners.

Masterodorremoval uses green-certified, non-ozone, non-chlorine treatments built specifically for the kind of embedded, hidden-source mildew smell that survives repeated vinegar-and-baking-soda cycles. Licensed technicians map moisture with professional-grade equipment, treat the actual source rather than the surface, and verify the odor is gone before calling the job finished. That matters for an RV especially, since aggressive chemical or ozone treatments can quietly degrade seals, upholstery, and finishes over time in ways you won’t notice until resale. If your RV has been fighting the same smell all season despite your best cleaning effort, check current service timelines and get a straight answer on what it will take to fix it for good.
Sources
- A brief guide to mold, moisture, and your home — EPA
- How to mold-proof your RV — RV Life Magazine
- RV upholstery odor: How to remove storage smell — BlackSeries
- How to remove mold and scum from your RV’s exterior — RVshare
- Found black mold in your RV? Start here — DoItYourselfRV
Recent Comments