
TL;DR:
- Proper odor inspection involves identifying sources such as HVAC systems and moisture zones to prevent recurring problems. Documentation, testing, and verification are essential steps to ensure odor removal is effective and lasting. Skipping these stages can lead to deal-breakers, making professional assessment and treatment crucial for property transactions.
Hidden odors can quietly kill a property deal. Buyers decide within minutes of walking through the door, and a single persistent smell can override every other selling point you have. Following proven odor inspection steps for agents gives you a clear process to identify problems before they become deal-breakers, protect your clients’ interests, and move properties faster. The industry term for this process is an odor impact assessment, and when done properly, it goes well beyond a quick sniff test at the front door.
Table of Contents
- Key takeaways
- 1. Understand the criteria for an effective odor inspection
- 2. Perform an initial walkthrough and identify odor sources
- 3. Inspect moisture and HVAC systems in detail
- 4. Confirm the source with testing and verification
- 5. Recognize common agent pitfalls and apply best practices
- My take on odor inspections after years in the field
- How Masterodorremoval supports agents through every inspection stage
- FAQ
Key takeaways
| Point | Details |
|---|---|
| Source removal comes first | Covering odors with sprays or candles fails without eliminating the origin point. |
| HVAC systems are hidden culprits | Contaminated ducts can re-emit odors long after the original source is cleaned. |
| Document everything you find | Written notes and photos protect you from disputes and guide remediation decisions. |
| Testing confirms what your nose suspects | Air quality sampling turns subjective impressions into documented, defensible data. |
| Sequence matters as much as effort | Assessment, correction, cleanup, and verification must happen in order to stick. |
1. Understand the criteria for an effective odor inspection
Before running through specific steps for odor detection, you need to understand the framework that makes any inspection worth doing. The most important principle is source control first. Ventilation and air fresheners cannot solve an odor problem if the source is still present and active. That single idea separates agents who consistently clear odor issues from those who keep re-listing the same problem property.
A professional odor impact assessment follows four structured stages: briefing, planning, sampling, and optional lab testing. That structure exists because sniffing a room is subjective. Two people in the same space can have completely different impressions, which means your documentation and methodology need to be objective enough to hold up if a buyer or seller disputes your findings.
When setting your inspection criteria, focus on these fundamentals:
- Moisture zones: Damp materials produce musty odors and mold growth quickly.
- HVAC components: Air handlers, coils, and ductwork can carry and re-emit odors throughout a property.
- Source vs. symptom: Replacing carpet over a subfloor soaked in pet urine treats the symptom. Removing and treating the subfloor addresses the source.
- Documentation standard: Every finding gets a photo, a location note, and a severity rating.
Pro Tip: Bring a notebook or use a property inspection app to log every room systematically. Vague recollections don’t help your client make decisions, and they don’t protect you if a dispute arises after closing.
2. Perform an initial walkthrough and identify odor sources
This is where the agent odor evaluation process actually begins. Walk the property with fresh air in your lungs. Spend a few minutes outside before entering so your nose resets. Once inside, let the building’s ambient conditions speak to you rather than rushing through rooms.
Common odor origins you should check immediately:
- Carpets and padding: Especially in pet-friendly homes or older rentals, padding absorbs urine and moisture that carpet cleaning rarely reaches.
- Walls and ceilings: Tobacco smoke and cooking grease penetrate drywall, particularly in kitchens and living areas.
- Cabinets and closets: Enclosed spaces trap mold, mildew, and pest odors at higher concentrations than open rooms.
- Plumbing fixtures and drains: A dry P-trap allows sewer gas to enter. Run water in every fixture and check for drain odors.
- Vents and registers: These act as delivery systems. A musty register often signals HVAC contamination, not just surface dust.
If the property has or recently had tenants, interview them or review any disclosures. Sellers sometimes reveal pet ownership or water damage in conversation they did not document in writing. Correctly identifying source location matters more than most agents realize. The room where the smell is strongest is not always the room where the odor originates.
Pro Tip: Close all windows for 30 minutes before your walkthrough if possible. Concentrated air makes subtle odors much easier to detect and gives you a more accurate picture of what buyers will actually experience.
Document your findings with photos and written notes for every area you check, even areas that seem fine. A clean room on your checklist is as useful as a flagged one.
3. Inspect moisture and HVAC systems in detail
Moisture and air distribution systems are where many inspections fall short. Moisture intrusion points correlate directly with musty odors and mold growth, and both require specialized attention beyond a visual scan.
Check these areas with care:
- Basement and crawl space: Look for staining, efflorescence on concrete, and standing water or elevated humidity.
- Bathroom caulking and grout: Failing seals allow water to penetrate behind walls, creating invisible mold colonies.
- Under sinks and around water heaters: Supply line drips and slow leaks leave mineral staining and create persistent damp odors.
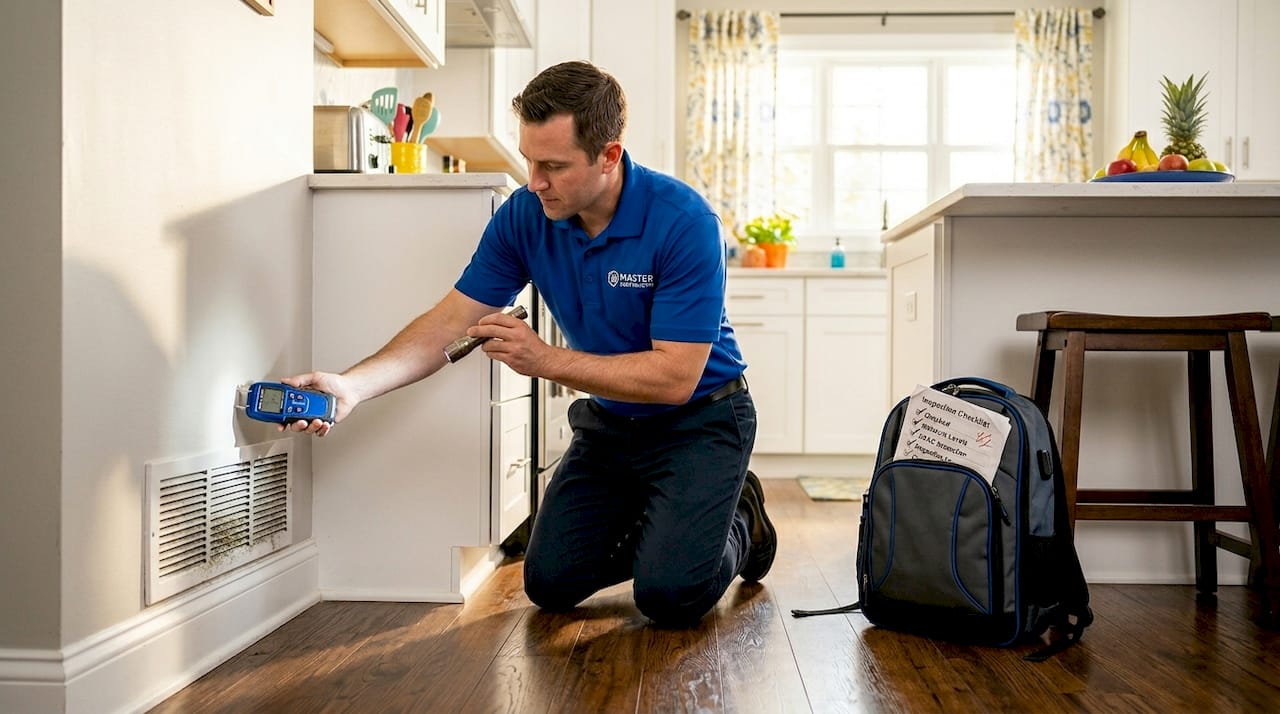
- HVAC air handler and coil: A dirty evaporator coil is a prime location for mold growth. Pull the filter and inspect the housing.
- Duct registers throughout the home: Residue inside registers or visible dust buildup signals that the duct system may be distributing odors.
If you have access to a moisture meter, use it on suspect walls, floors, and ceiling areas. Infrared cameras can reveal temperature differentials that suggest hidden moisture. You do not need to own this equipment. Noting that a professional tool assessment is warranted is a valid and professional inspection outcome.
HVAC re-emission is one of the most common reasons odor problems return after cleaning. Even when the original source, such as a smoker’s furniture or a pet bed, has been removed, contaminated ductwork keeps circulating those compounds into every room. Flagging HVAC cleaning as a required step in your inspection report is not overkill. It is how you prevent a problem from coming back after remediation.
4. Confirm the source with testing and verification
Your sensory impressions are a starting point, not a conclusion. For complex or unexplained odors, air quality sampling turns a subjective observation into measurable chemical data. This matters during transactions when a buyer’s inspector might challenge your findings or a seller disputes the severity of a problem.
Here is a practical breakdown of your verification options:
| Method | Best for | Limitation |
|---|---|---|
| Sensory walkthrough | Initial identification, gross screening | Subjective, olfactory fatigue sets in fast |
| DIY mold test kits | Basic mold screening in accessible areas | Prone to false positives, limited species ID |
| Professional air sampling | Hidden mold, VOCs, post-remediation check | Costs more, requires lab turnaround time |
| Surface swab testing | Identifying specific contaminants on materials | Localized only, misses airborne compounds |
For persistent or unexplained odors, professional air sampling is the right call. Post-remediation lab verification is particularly important for smoke-related odors, which can return months after surface cleaning appears successful.
One more thing worth knowing: professional sealing compounds can lock in residual odors when contaminants have deeply penetrated building materials. If testing reveals deeply embedded compounds, sealing may be a required step before any deodorization treatment has a lasting effect.
Always verify that remediation worked. A post-treatment walkthrough or follow-up air sample protects your reputation and gives your client documented proof that the property is genuinely odor-free.
5. Recognize common agent pitfalls and apply best practices
Even experienced agents make consistent mistakes during odor assessments. Knowing where the process typically breaks down helps you avoid the same traps. Here is a side-by-side view of common missteps versus the right approach:
| Common pitfall | Best practice alternative |
|---|---|
| Using air fresheners before inspection | Inspect with neutral air conditions, then deodorize |
| Treating carpet odor with spray only | Remove carpet and treat subfloor before replacement |
| Skipping HVAC in the inspection checklist | Always inspect air handlers, coils, and registers |
| Relying solely on seller disclosure | Conduct independent sensory and documentation check |
| Closing out without post-remediation check | Verify treatment success with walkthrough or testing |
Odor resolution frequently fails when agents or owners focus on covering symptoms rather than eliminating sources. A property that smells of lavender at the showing will smell of something else two weeks after the buyer moves in, and that is a problem that comes back to you.
Documentation is your best protection. Thorough notes, photos, and a clear timeline of findings and recommended actions position you as a knowledgeable advisor rather than someone who missed an obvious issue. Check out 10 issues to ask about during home inspections to expand your odor screening checklist beyond the basics. The agents who handle odor issues professionally are the ones their clients refer.
My take on odor inspections after years in the field
I’ve seen enough odor-related deals fall through to know that the HVAC system is almost always the thing nobody checks. Sellers clean the carpets, repaint the walls, and call it done. But the ductwork keeps circulating whatever contaminated the home in the first place, usually smoke or pet dander, right back into every room. Buyers smell it the second the system kicks on, and they walk.
What I’ve learned is that sequence and verification are not optional extras. They are the whole process. Assess, correct, clean, measure. Skip any of those four and you are gambling on a result rather than engineering one.
My other hard-won lesson: documentation is underrated. Agents who photograph and log every finding have no disputes. Their remediation instructions are clear, their post-treatment walkthroughs are clean, and their clients trust them. Agents who work from memory end up in arguments about who knew what and when.
If an odor issue is beyond what you can confidently assess and document, calling in a professional is not an admission of failure. It is the decision that closes the deal.
— Master
How Masterodorremoval supports agents through every inspection stage
When your inspection flags an odor problem that standard cleaning cannot fix, the next step matters enormously. Masterodorremoval works directly with real estate agents and property managers to deliver fast, source-based odor removal that holds up under buyer scrutiny.

Unlike surface sprays or ozone treatments, Masterodorremoval’s green-certified methods target the actual odor compounds embedded in materials, HVAC systems, and subfloor structures. Same-day and next-day availability means you are not delaying a listing or a closing while waiting for results. Their team handles tobacco, pet, mold, smoke, and food odors across homes, commercial properties, and specialty spaces. For agents who need documented, verified results to protect a transaction, their odor removal specialists provide exactly that. You can also explore their full process on the odor removal done right page to see exactly how they approach source elimination and verification. Reach out for a consultation before your next listing.
FAQ
What are the first steps for odor detection in a property?
Start with a sensory walkthrough after letting the property air-sit with windows closed for 30 minutes. Check carpets, drains, HVAC registers, and enclosed spaces like cabinets and closets before forming any conclusions.
How do you inspect odors that have no obvious source?
Follow the airflow. Odors travel via HVAC and may originate in a room different from where they are most noticeable. Professional air sampling can identify VOCs and pinpoint hidden sources when sensory inspection falls short.
Why is HVAC inspection part of the odor evaluation process?
Contaminated HVAC components re-emit odors throughout a property even after the original source is removed. Inspecting and cleaning ducts, coils, and air handlers is mandatory for a permanent result.
When should an agent bring in a professional for odor assessment?
When odors are persistent, unidentified, or tied to smoke, mold, or sewage, professional assessment with lab verification is the right call. It provides defensible documentation that protects all parties in a transaction.
Does post-remediation testing really matter?
Yes. Verifying that treatment worked is how you confirm the problem is solved rather than masked. Lab verification after remediation is especially important for smoke and mold-related odors, which can return months after surface-level cleaning.
Recent Comments