
A well-run yacht interior freshness workflow starts with one principle: clean top to bottom, on a fixed schedule, with products built for the marine environment. That single discipline prevents the salt air, humidity, and trapped moisture that quietly destroy luxury finishes and breed the odors that no amount of air freshener can mask. Here is the full blueprint.
Core workflow at a glance:
- Daily: Wipe high-touch surfaces, check for moisture, open hatches for airflow
- Weekly: Vacuum upholstery and carpets, dust vents, spot-clean fabrics
- Monthly: Deep-clean windows, flip mattresses, clear cabinets, inspect hidden spaces
- Ongoing: Manage humidity with dehumidifiers or moisture-absorbing packets, run ventilation cycles after cleaning, and address odors at the source rather than masking them
Prevention does most of the work. A consistent routine stops mildew, salt buildup, and odor from reaching the point where restoration becomes necessary.
Table of Contents
- How to build a cleaning schedule that actually holds up at sea
- What cleaning supplies actually belong on a yacht
- How to prepare the interior before you start cleaning
- The step-by-step top-to-bottom cleaning workflow
- Odor control and air quality: the part most crews underestimate
- Why professional eco-friendly odor removal belongs in your maintenance plan
- Masterodorremoval brings permanent freshness to yacht interiors
- Key Takeaways
How to build a cleaning schedule that actually holds up at sea
Scheduling yacht interior maintenance is different from scheduling a home clean. Humidity, salt air, and the physical motion of the vessel accelerate surface wear in ways that a weekly wipe-down alone cannot address. The environment demands a tiered approach.
Daily tasks focus on the areas that degrade fastest. Wipe down all high-touch surfaces: handrails, light switches, galley countertops, and bathroom fixtures. Dry any wet entry areas immediately, since deck shoes track in surprising amounts of water. Open a few hatches or run fans to keep air circulating, especially in sleeping cabins.
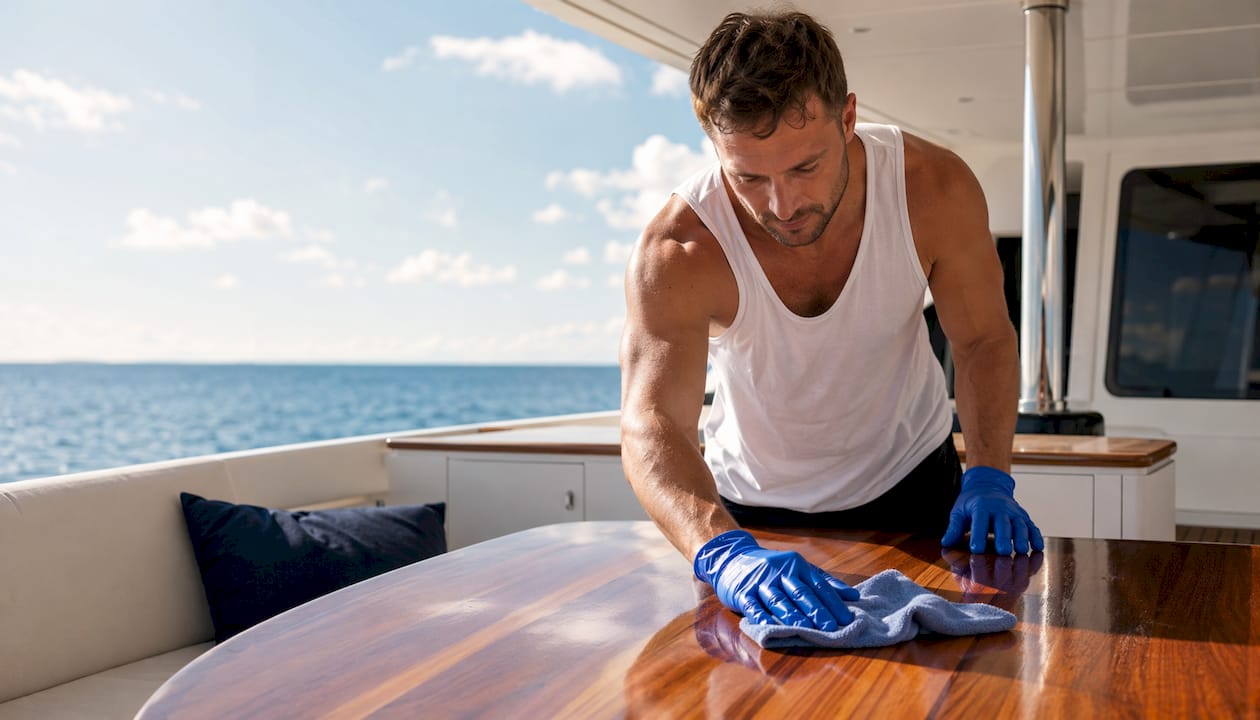
Weekly tasks include vacuuming all upholstery and carpets, paying close attention to crevices where salt crystals and crumbs collect. Dust and wipe down every air vent, since salt buildup in vents reduces airflow efficiency and accelerates mold conditions. Spot-clean any fabric stains before they set.
Monthly sessions cover what daily and weekly routines miss:
- Clean all interior windows and mirrors with a marine-safe glass cleaner
- Flip mattresses and rotate linens for even wear
- Clear out every cabinet and drawer, checking for moisture accumulation
- Inspect behind appliances and under-sink spaces, which are prime mold locations
- Polish floors, whether teak, vinyl, or carpet
Marine-specific considerations shape all three tiers. After coastal passages, rinse surfaces with fresh water to remove salt residue before it dries and etches finishes. Build ventilation cycles into the post-cleaning routine: surfaces need to dry completely before hatches close, or you lock moisture in rather than out.
What cleaning supplies actually belong on a yacht
The wrong product does more damage than no product at all. Non-marine-grade cleaners accelerate interior deterioration, causing discoloration and lowering resale value on materials that cost far more to replace than to protect. The selection criteria for a yacht cleaning kit are specific: non-abrasive, salt-resistant, biodegradable where possible, and scent-appropriate for enclosed spaces.
For most interior cleaning tasks, a short list of items such as white vinegar, baking soda, castile soap, and essential oils covers everything. Specialized products like laundry detergents, leather conditioners, and material-specific treatments should come from eco-certified, marine-safe brands.
Tools matter as much as products. Microfiber cloths capture dust and bacteria mechanically, often without any chemical at all. Color-coded cloth systems are a hygiene standard in professional yacht interiors, not a preference: one color for heads, another for the galley, another for general surfaces. Cross-contamination between zones is a real sanitation risk on a vessel where guests and crew share close quarters.
For tight spaces, cotton buds and toothpicks are the tools that separate a genuine detail clean from a surface wipe. Vents, screw grooves, switch plates, and drain edges all require precision tools that a standard cloth cannot reach.
Storage and maintenance of cleaning supplies onboard:
- Store products in sealed, labeled containers to prevent spills in rough seas
- Keep marine-safe cleaners away from heat sources and direct sunlight
- Replace microfiber cloths when worn, not just when visibly stained
- Maintain a dedicated cleaning caddy stocked with toothpicks, cotton buds, lint-free cloths, garbage bags, a squeegee, and drop cloths before starting any detail session
- Check eco-conscious product options that protect interior surfaces without introducing harsh chemical residue into bilge water
How to prepare the interior before you start cleaning
Preparation determines how effective the actual cleaning will be. Skipping it means cleaning around obstacles, missing hidden dirt, and locking in moisture rather than releasing it.
Start by removing clutter. Pull items out of cabinets, off countertops, and away from bulkheads so you can reach every surface. Move furniture that can be shifted, and pass larger pieces to a secondary crew on the dock if necessary. A detail clean that works around fixed objects is not a detail clean.
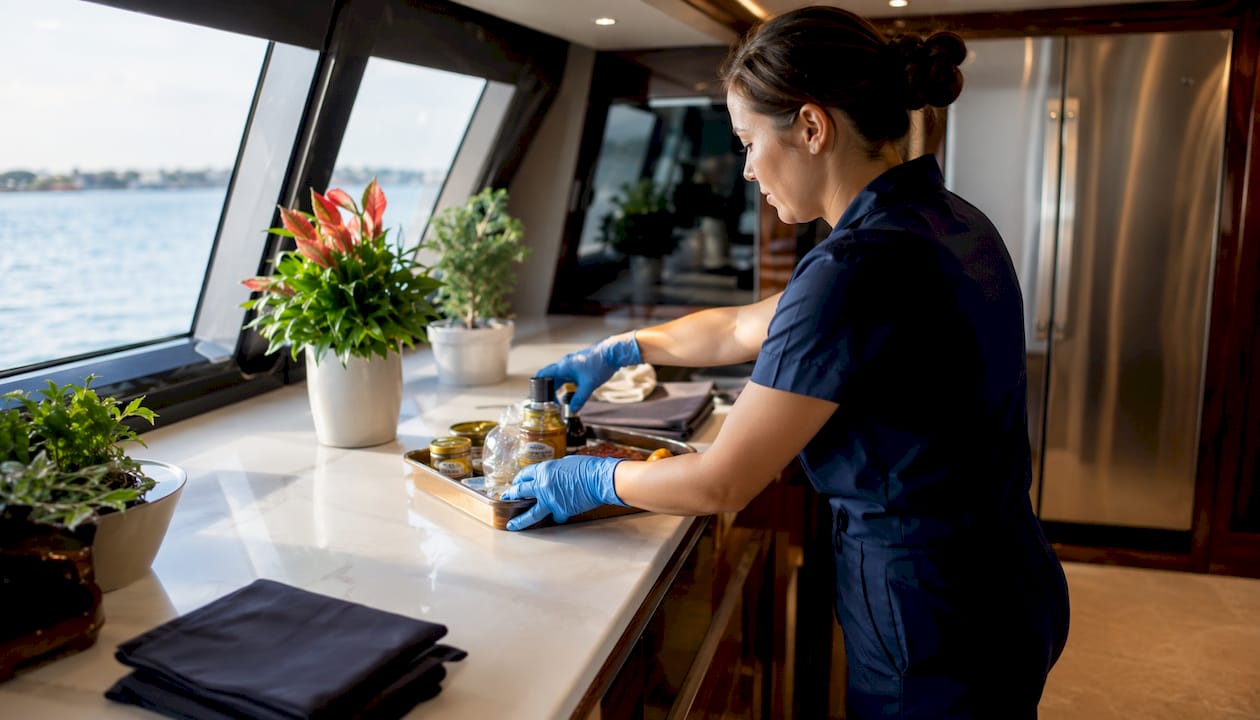
Ventilation comes next. Open all hatches and port lights, and run fans to push stale air out before introducing cleaning products. This step matters for two reasons: it reduces existing odors before you begin, and it prevents cleaning product fumes from concentrating in enclosed spaces. Drop cloths should go down over expensive upholstery and flooring before any wet work starts.
Preparation checklist:
- Remove all loose items and store them safely off the vessel or in a designated staging area
- Open hatches, port lights, and any ventilation panels to maximize airflow
- Set up fans to create directional airflow from bow to stern or from lower to upper decks
- Lay drop cloths over upholstery, carpets, and woodwork in areas adjacent to cleaning zones
- Brief crew and guests on restricted access areas during the cleaning session
- Collect all laundry and linens before starting. Structured laundry tracking prevents guest items from being lost during the shuffle of a full interior clean, which is a real operational risk on charter yachts
The step-by-step top-to-bottom cleaning workflow
The top-to-bottom method prevents re-contamination by gravity-driven dirt and runoff. Dust, cleaning solution, and debris fall downward. If you clean floors before ceilings, you clean floors twice. The sequence below follows that logic through every zone.
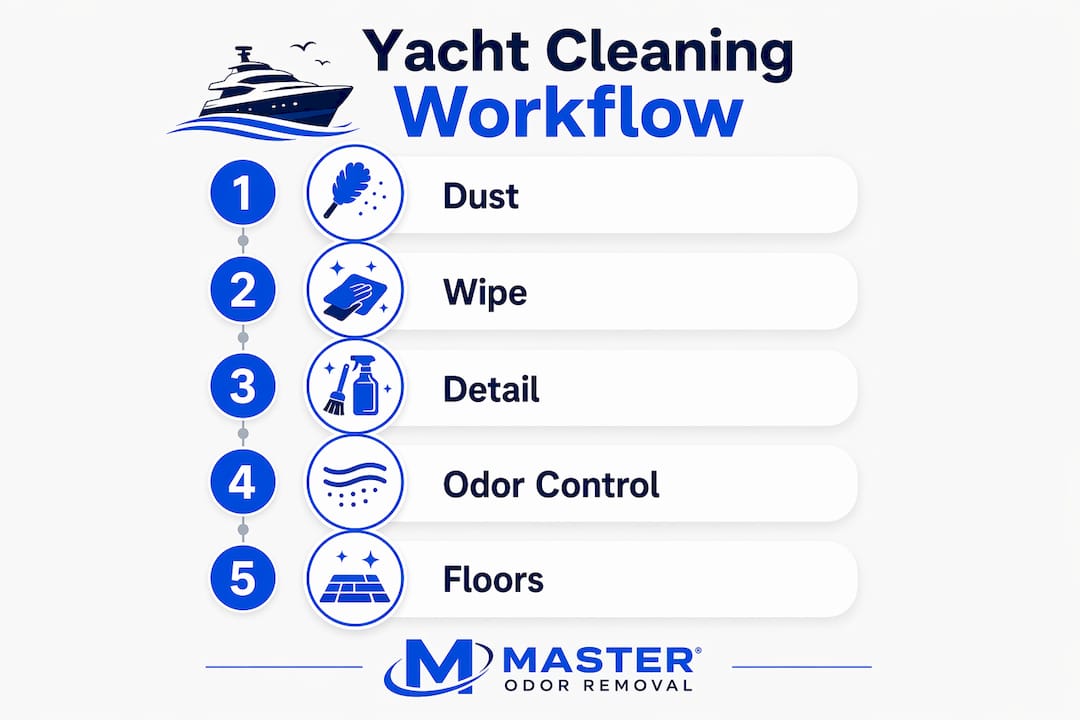
Step 1: Eliminate all dust from the top down
Begin at the ceiling. Vacuum deck heads, lighting fixtures, and bulkheads using a soft brush attachment, working carefully downward so dust falls to areas not yet cleaned. Hit the tops of doors, window frames, and any overhead storage. A soft lint brush handles surfaces too delicate for a vacuum.
Step 2: Wipe down all surfaces
Once vacuuming is complete, follow with a damp microfiber cloth. Work from deck heads down through light fittings, bulkheads, glass, and window coverings. Drop blinds and close curtains to clean the fabric properly and check that all fittings are in working order. Move to cupboards and drawers, then down to flooring. Check that all lights and electrical items are functioning as you go.
Step 3: Detail the micro surfaces
This is where professional cleaning separates from a standard wipe-down. Clean the grooves in joinery, handles, screws, switch plates, and fastenings. Use cotton buds and toothpicks for air conditioning vents, drain edges, the gap where the bed meets the wall, and the buttons on phones and remote controls. A toothpick or cotton bud dipped in alcohol disinfects these high-touch points effectively.
Step 4: Zone-specific care
Galley:
- Degrease all appliances inside and out
- Polish stainless steel to a streak-free finish using a marine stainless cleaner
- Sanitize countertops and sinks with a biodegradable marine-safe disinfectant
- Clean interior windows and portlights
Heads (bathrooms):
- Scrub all surfaces with a color-coded cloth designated for this zone only
- Detail pipes, plugs, and drain edges with cotton buds to remove hair and soap scum
- Clean mirrors last, using a soft soap followed by a dry lint-free cloth to avoid streaks
Staterooms:
- Vacuum under beds and inside lockers
- Condition leather seating and panels with a marine-specific leather conditioner. Automotive products often contain solvents that damage marine-grade leather
- Freshen with marine-safe products only
Woodwork and special surfaces:
- On-site surface restoration for wood and stone can address damage at 50–80% less cost than full replacement, which makes conditioning and protective treatment during routine cleaning a direct financial decision
- Use conditioning oils on wooden furnishings to prevent dryness and cracking
- Never use harsh chemicals on fine interior materials; minimal product application protects finishes longer
Step 5: Floors last
Vacuum carpets thoroughly, then mop or polish hard floors. Teak, vinyl, and carpet each require specific products. On teak, avoid cleaners that can run off and stain adjacent surfaces. Dry all floors completely before replacing furniture or allowing foot traffic.
Stain and spill removal tips:
- Blot, never rub: rubbing spreads the stain and pushes it deeper into fabric fibers
- Use a marine-safe fabric cleaner on upholstery; test on a hidden area first
- For salt residue on hard surfaces, a diluted white vinegar solution lifts deposits without damaging finishes
- Turn off heat sources during cleaning to prevent cleaning solutions from drying too fast and leaving residue
Odor control and air quality: the part most crews underestimate
Odors on a yacht rarely come from a single source. Bilges, galley grease, damp fabrics, bathroom drains, and the general humidity of a closed marine environment all contribute. Addressing air quality as a separate discipline, not just a byproduct of cleaning, is what keeps a yacht smelling genuinely fresh rather than just recently cleaned.
Effective humidity management means drying surfaces completely after cleaning and maintaining ventilation until the interior is fully dry. Humidity trapped behind bulkheads or inside closed cabinets is the primary driver of mildew growth, and mildew odor is one of the hardest to eliminate once it establishes.
Practical odor control measures:
- Run dehumidifiers in closed spaces, especially during storage or in humid climates
- Place moisture-absorbing packets inside lockers, under-sink cabinets, and storage bilges
- Use marine-safe essential oils or diffusers for a signature scent. Synthetic fragrances can trigger headaches and allergic reactions in enclosed spaces, and neutral, clean interiors read as a higher standard than heavy perfume
- Baking soda placed in open containers inside lockers and bathrooms absorbs ambient odors without adding fragrance
- Clean all air vents and filters on a weekly basis; salt buildup reduces airflow and allows odor-causing particles to recirculate
- Inspect bilges monthly for stagnant water, which produces the musty smell that guests notice immediately on boarding
For fabrics, treat upholstery and soft furnishings with antimicrobial sprays designed for marine use. UV and mildew-resistant fabric treatments applied seasonally extend the life of cushions and drapes while reducing the conditions that generate odor. Leather conditioning prevents the cracking and dryness that allows odor to penetrate the material.
Pro Tip: After any deep clean, run fans for at least two hours with hatches open before closing the vessel. Locking in residual moisture from cleaning products is one of the most common causes of mildew odor between maintenance sessions.
Why professional eco-friendly odor removal belongs in your maintenance plan
Routine cleaning handles surface-level freshness. It does not resolve deep or persistent odors that have penetrated fabrics, woodwork, or HVAC systems. Tobacco, mildew, food, and smoke odors bond at a molecular level with porous materials, and no amount of baking soda or ventilation fully neutralizes them once they are embedded.
Professional eco-friendly odor removal uses green-certified methods that avoid ozone and chlorine-based treatments. This matters on a luxury vessel: ozone at high concentrations damages rubber seals, degrades certain fabrics, and requires full crew evacuation during treatment. Chlorine-based products leave residue that can harm sensitive interior materials and introduce chemical odors of their own. Sustainable neutralizers work at the molecular level without these trade-offs.
Benefits of professional odor remediation for high-value vessels:
- Permanent elimination of tobacco, mildew, marijuana, food, and smoke odors rather than temporary masking
- Green-certified methods that protect luxury materials including leather, wood, and fine upholstery
- Licensed professionals who can identify odor sources that crew may have missed, including leaks behind bulkheads or contamination in HVAC ducting
- Same or next-day availability for pre-charter preparation or post-incident response
- No harsh chemical residue left on surfaces or in bilge water
- Preservation of the interior atmosphere that guests and owners expect from a premium vessel
The yacht odor removal process at the professional level also addresses mystery odors: the ones that appear intermittently, shift location, or resist every DIY attempt. These typically originate in hidden spaces, and finding them requires both experience and systematic inspection rather than repeated surface treatments.
Routine maintenance and professional remediation work together. A well-maintained interior needs professional odor treatment far less often, and when it does need it, the results last longer because the underlying conditions have been controlled.
Masterodorremoval brings permanent freshness to yacht interiors
Routine cleaning keeps a yacht presentable. When an odor has gone deeper than a mop and a diffuser can reach, that is where Masterodorremoval steps in.
Masterodorremoval specializes in permanent yacht odor elimination using green-certified, eco-friendly methods that never rely on ozone or chlorine. For yacht owners and crew who have already run a solid maintenance routine but are still dealing with embedded tobacco, mildew, smoke, or food odors, Masterodorremoval’s licensed professionals locate the source, treat it at the molecular level, and leave the interior genuinely neutral rather than temporarily masked. Same or next-day service means pre-charter turnarounds are realistic, not stressful. The process protects leather, wood, and fine upholstery rather than degrading them. If you are ready to resolve an odor that routine cleaning has not touched, get a quote from Masterodorremoval and have it handled before your next guests board.
Key Takeaways
A consistent yacht interior freshness workflow combining daily maintenance, marine-safe products, top-to-bottom cleaning, and professional odor remediation is the most reliable way to protect luxury interiors and keep a vessel guest-ready year-round.
| Point | Details |
|---|---|
| Top-to-bottom cleaning order | Always clean from ceilings down to floors to prevent dirt and runoff from re-contaminating cleaned surfaces. |
| Tiered schedule by frequency | Daily wipe-downs, weekly deep cleans, and monthly sessions each address different layers of buildup. |
| Marine-safe products only | Non-marine-grade cleaners accelerate discoloration and lower resale value; use biodegradable, salt-resistant formulas throughout. |
| Humidity control prevents odor | Drying surfaces completely and maintaining ventilation after cleaning stops mildew before it starts. |
| Masterodorremoval for deep odors | When embedded tobacco, mildew, or smoke odors persist after routine cleaning, Masterodorremoval’s green-certified professionals eliminate them permanently without ozone or chlorine. |
Recent Comments