
Act fast: scrape and blot the vomit immediately, treat the spot with an enzymatic cleaner, then extract and dry the area completely. That sequence, done in order, gives you the best shot at removing vomit smell from a car permanently instead of just covering it up. Skip the enzymes or rush the drying, and the odor almost always comes back within days.
TL;DR:
- Immediate scraping, blotting, and enzymatic treatment within the first hour are crucial to preventing persistent vomit odors in a vehicle.
- Enzymatic cleaners require 10 to 24 hours of dwell time and must remain damp to effectively break down protein residues deep in carpets and padding.
- Professional extraction and heat-based cleaning methods reach deeper contamination than DIY equipment, especially for porous materials or embedded foam.
- Baking soda, activated charcoal, and ventilation delay odor reabsorption but do not neutralize organic residues without enzymatic treatment.
- For persistent or deep-seated contamination, professional services using specialized equipment offer better results than repeated DIY efforts.
Table of Contents
- How Do You Get Rid of Vomit Smell in a Car Quickly?
- What Actually Removes Vomit Odor for Good?
- Cleaning Vomit Off Different Car Materials Without Ruining Them
- How Long Does It Take for Vomit Smell to Go Away?
- When Should You Call a Professional for Vomit Smell?
- Why Neutralizing the Source Beats Masking It Every Time
- Get Your Car’s Vomit Smell Handled Right the First Time
- Sources
How Do You Get Rid of Vomit Smell in a Car Quickly?
The first half hour decides whether you’re dealing with a five minute cleanup or a week of lingering smell. Vomit contains gastric acid, bile salts, and partially digested proteins that bond chemically with carpet fibers and foam padding, which is why wiping it up with a paper towel and calling it done almost never works. Acting within the first hour dramatically improves your odds of a permanent DIY fix; wait a day, and you’re often looking at professional extraction instead.
Here’s the order that actually works:
- Put on nitrile gloves and a dust mask before touching anything, and crack the windows for airflow.
- Scrape solid material outward with a plastic scraper or old spoon, and bag it immediately rather than pushing it toward the center of the stain.
- Blot liquid with paper towels or a clean rag. Blot, don’t rub — scrubbing drives contaminants deeper into the carpet backing and foam underneath.
- Pull up floor mats and set them aside so they don’t reabsorb odor from the seat or carpet.
- Sprinkle baking soda over the wet area and let it sit for a short period to pull out surface moisture before you move to deeper treatment.
- Vacuum the baking soda thoroughly, then leave doors open for ventilation. Avoid parking in direct sun or blasting the heater at this stage, since heat can bake residue into the fibers before you’ve treated it.
Pro Tip: Keep a small kit in your trunk: nitrile gloves, a plastic scraper, a roll of paper towels, and a travel-size enzymatic cleaner. Treating an accident in the first ten minutes beats any deep-clean method you’ll read about later.
What Actually Removes Vomit Odor for Good?
Baking soda and ventilation buy you time, but they don’t neutralize what’s soaked into the padding. That’s where enzymatic cleaners, extraction, and a couple of supporting tools come in.
Enzymatic cleaners work through proteases and lipases, enzymes that break down the proteins and fats in vomit into odorless compounds instead of just absorbing or masking them. Enzymes plus extraction are the most reliable way to neutralize odor at the source, rather than covering it with fragrance. Saturate the affected area, don’t just mist it, and let it sit. Dwell time matters more than most people expect: enzymatic cleaners typically need 10 to 24 hours of contact to fully break down the proteins, and they keep working only while the fabric stays damp. Drying the seat early cuts the treatment short before it’s finished.
Extraction or wet vacuuming comes next, pulling the broken-down residue and moisture out of the carpet backing and foam rather than letting it dry back into the fibers. Professional truck-mounted extractors use much hotter water and far higher vacuum pressure than a rental unit or shop vac, which is a real limitation of the DIY version. A home carpet extractor helps with surface-level contamination, but it often can’t reach what’s soaked two inches into a seat cushion.
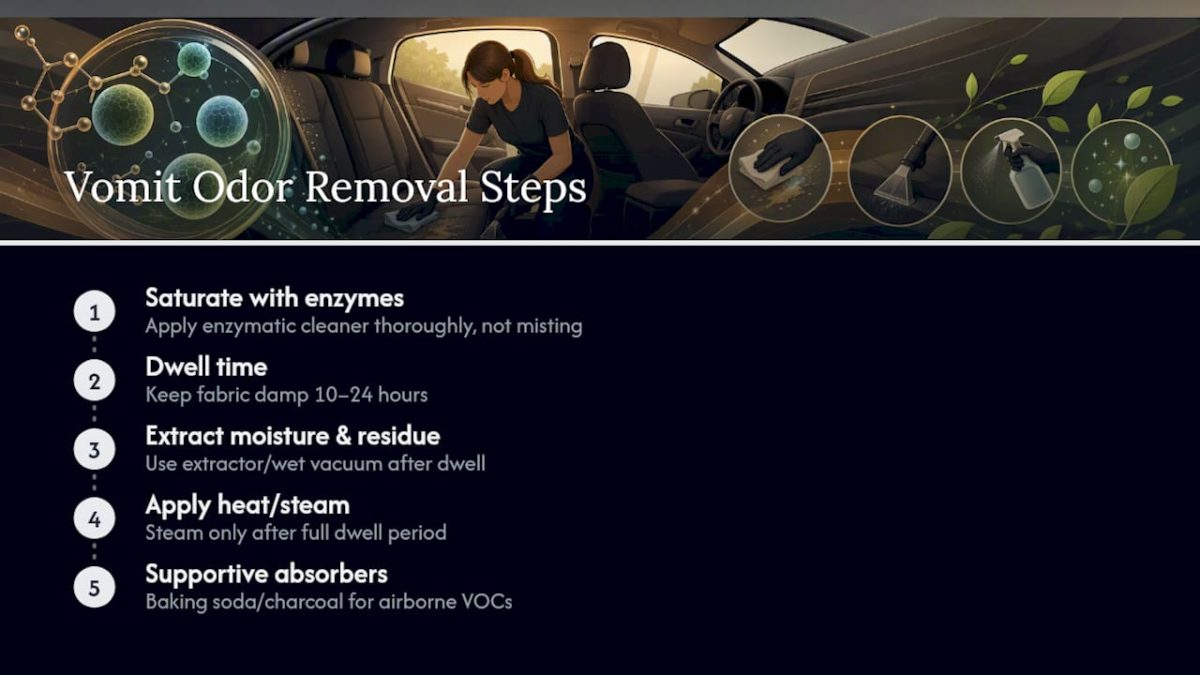
Steam cleaning has a place, but the sequence matters. Apply steam or heat after the enzymatic dwell time is finished, not before. Steaming too early can set proteins into the fibers rather than lifting them out, which is the opposite of what you want.
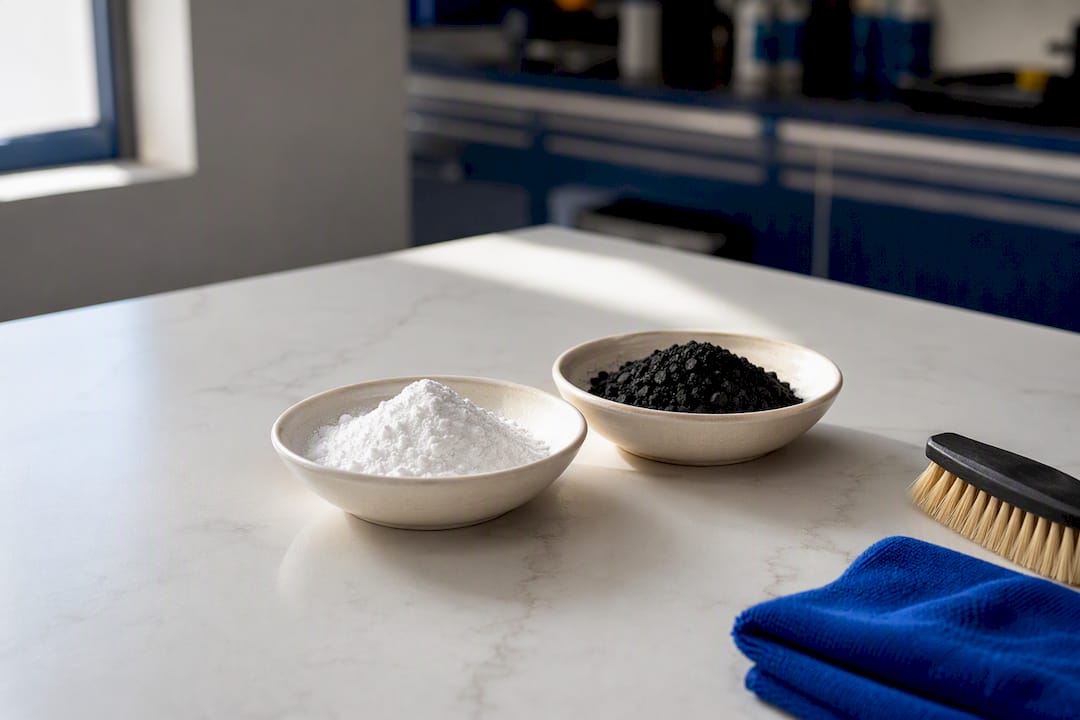
Baking soda and activated charcoal are useful adjuncts for absorbing airborne VOCs and lingering surface odor, but neither reaches organic residue trapped in foam or carpet backing on its own. Think of them as supporting players, not the main event. Baking soda and charcoal absorb odors but won’t neutralize deep organic residue by themselves, which explains why a car that “smells fine” after a baking soda treatment sometimes stinks again a week later.
Ozone and chemical oxidizers show up in a lot of online advice, and professionals do use them for extreme, whole-cabin contamination. But thermal fogging and chlorine dioxide gas require strict safety protocols and cleared cabins — they’re not something to run in your garage with the doors shut, and never with people or pets inside the vehicle.
Cleaning Vomit Off Different Car Materials Without Ruining Them
Fabric, leather, and vents don’t respond to cleanup the same way, and treating them identically is how people end up with a bleached seat or a moldy headliner.
- Fabric seats and carpet: saturate with enzymatic cleaner, let it dwell, then extract. Skip heavy scrubbing and skip high heat until the dwell time is done.
- Perforated leather: those tiny holes let liquid seep straight through to the foam underneath, where surface cleaning can’t reach it. Perforated leather often needs a professional to access the padding beneath the surface, and treating leather seats the wrong way can crack or discolor the surface long before the smell is gone.
- Seat belts and headliner: clean gently with a damp cloth and mild enzymatic solution, but never fully soak the webbing. Let seat belts air dry completely before retracting them into the housing, or you’ll trap moisture where it can’t evaporate.
- Vents and HVAC: a quick blast of compressed air combined with a light enzyme mist clears out contamination that traveled into the ductwork. Replace the cabin air filter afterward. It’s cheap, and a filter that absorbed vomit vapor will keep releasing odor for weeks.
- Floor mats: pull them out and treat separately. Rubber mats handle a pressure washer fine; fabric mats go through a normal wash cycle.
How Long Does It Take for Vomit Smell to Go Away?
Drying is where most home cleanups quietly fail. A seat that looks dry on top can still be damp two inches down, and any trapped moisture gives odor a place to regrow.
- Position a fan for direct high airflow across the treated area, and add a dehumidifier if the car is enclosed in a garage.
- Press a dry paper towel into the treated spot after several hours. If it comes away damp, keep drying or extract again before moving on.
- Swap the cabin air filter, and if your car sees a lot of odor incidents, consider one with activated charcoal built in.
- Hold off on air fresheners or masking sprays until you’re confident the source is neutralized. Spraying fragrance over a still-active odor just blends two smells into one, and it can make it harder to tell whether the treatment actually worked.
When Should You Call a Professional for Vomit Smell?
DIY has real limits, and knowing where they are saves you from repeating a losing cleanup three times before giving up. Call in a pro when the smell is still noticeable after a full extraction cycle, when the accident happened more than 24 hours ago, or when you’re dealing with perforated leather, a heavily saturated foam cushion, or odor that’s clearly traveled into the HVAC ducting.
Here’s what shifts once you hire it out:
- Truck-mounted extraction runs hotter water at higher pressure than any rental unit, reaching contamination two or three inches into foam that a shop vac never touches.
- Targeted enzyme protocols are matched to the material and how deep the contamination sits, rather than one generic spray for the whole cabin.
- Cabin duct cleaning addresses odor that’s already migrated into the ventilation system, something no amount of seat cleaning fixes.
- Thermal fogging or oxidizer treatments handle the rare extreme case, applied by someone trained in the safety protocol rather than attempted at home.
Turnaround for a single vehicle typically runs a few hours to a full day depending on how deep the contamination sits, and pricing varies by vehicle size and severity. Before booking, ask whether the company uses ozone or chlorine (and whether they avoid it), whether the treatment comes with any guarantee, and whether technicians are trained specifically on vehicle odor neutralization rather than general cleaning.
Pro Tip: Ask any company you’re considering how they handle perforated leather specifically. A vague answer usually means they’re planning to surface-clean and hope, not actually treat what’s under the seat.
Why Neutralizing the Source Beats Masking It Every Time
Most people reach for an air freshener first, and that’s the mistake that turns a one-day problem into a one-month problem. Fragrance doesn’t touch the proteins bonded to your upholstery. It just adds a second smell on top of the first, and the combination can actually make the original odor harder to identify and treat correctly. Masterodorremoval builds its entire approach around that distinction: neutralize the source, don’t perfume it.
Our green-certified process skips ozone and chlorine entirely, which matters more than most car owners realize since oxidizer treatments used incorrectly around people or pets carry real safety risks. We lean on enzymatic protocols and proper extraction instead, because that combination gets to what’s actually in the fibers rather than what’s floating above them. If you’re staring at a seat that still smells off after your own cleanup attempt, a vehicle odor assessment can tell you fast whether you’re dealing with surface residue or something that’s soaked further than you can reach.
— Master
Get Your Car’s Vomit Smell Handled Right the First Time
If you’ve scraped, blotted, treated, and extracted, and the smell is still there, you’re not failing at cleaning. You’re running into the physical limit of what a shop vac and a spray bottle can do against contamination that’s soaked into foam. That’s the exact situation Masterodorremoval exists for.
A visit typically starts with an assessment of how far the contamination has spread, whether it’s still surface level or has reached the padding and vents, followed by targeted enzymatic treatment and hot water extraction using equipment no consumer rental matches. The methods used avoid ozone and chlorine, reducing chemical exposure risk. Before a technician arrives, clear personal items from the affected seat and note roughly when the incident happened, since that timeline shapes the protocol. If your seats are perforated leather or the smell has reached the HVAC system, this is worth handling directly rather than attempting a third round of DIY. Book an odor removal assessment today and find out what it actually takes to get your car back to neutral.
Sources
- How to Get Vomit Smell Out of Car — Car Care Total
- How to Get Vomit Smell Out of Car — AutoZone
- How to Remove Vomit Smell from Car: A Professional’s Guide – The Mobile Buff
- How to Remove Vomit Smell from Your Car — wikiHow
Recent Comments