
TL;DR:
- Following a structured top-down cleaning checklist ensures effective vehicle interior maintenance and prevents damage. Using material-specific products and regular schedules, especially for pet owners, helps preserve surfaces and eliminate odors. Professional odor removal services are necessary for deep-seated smells that surface cleaning cannot address.
A vehicle interior cleaning list is a structured, step-by-step checklist covering every surface, tool, and product needed to keep your car cabin spotless and well-preserved. Professional detailers follow a 12-step sequence from debris removal to protective dressing, and that standard exists for good reason. Skipping steps or using the wrong products leads to residue buildup, material damage, and odors that compound over time. Whether you clean your car yourself or work with a professional service like Masterodorremoval, following a structured interior detailing checklist is the fastest path to a genuinely clean cabin.
1. What belongs on a vehicle interior cleaning list?
A complete car interior cleaning checklist covers 10 distinct task categories, each targeting a specific surface or zone. Professional detailing uses a top-down sequence so that dust and debris fall onto uncleaned surfaces below, not onto areas you just finished. That single rule saves you from re-cleaning the same spot twice.
Here is the full sequence every vehicle owner should follow:
- Remove all belongings and floor mats. Clear out trash, personal items, and loose gear before touching any surface.
- Vacuum from top to bottom. Start with headliner, seats, and door panels, then move to the floor. Use a brush attachment on fabric and a crevice tool for seat tracks and console gaps.
- Blast vents and crevices with compressed air. Compressed air and detail brushes reach button gaps, vent slats, and seat rail channels that a vacuum nozzle cannot access.
- Clean the headliner. Use a lightly dampened microfiber towel and a gentle upholstery cleaner. Never saturate the headliner. Excess moisture warps the backing material.
- Wipe door panels and clean door jambs. Door jambs are critical and often missed. A dirty jamb makes the whole interior feel unfinished, even when the cabin looks clean.
- Clean the dashboard, center console, and steering wheel. Use a product matched to the surface material. Avoid heavy dressings on the steering wheel.
- Clean and condition seats and seat belts by material. Leather needs a pH-neutral cleaner followed by a conditioner. Fabric needs a dedicated upholstery shampoo. Seat belts collect sweat and oils and should be wiped with a mild cleaner.
- Clean interior glass. Use an ammonia-free glass cleaner and two microfiber towels: one to apply, one to buff dry.
- Shampoo carpets and floor mats separately. Treat mats outside the vehicle. Use a stiff brush to work shampoo into carpet fibers, then extract moisture thoroughly.
- Apply protective treatments. Finish plastics, vinyl, and leather with matte or satin finish protectants rather than wet-look products. Wet-look finishes attract dust and create glare.
Pro Tip: Always clean floor mats outside the vehicle. Shaking them inside defeats the purpose of vacuuming the cabin first.
2. Which products and tools do you actually need?
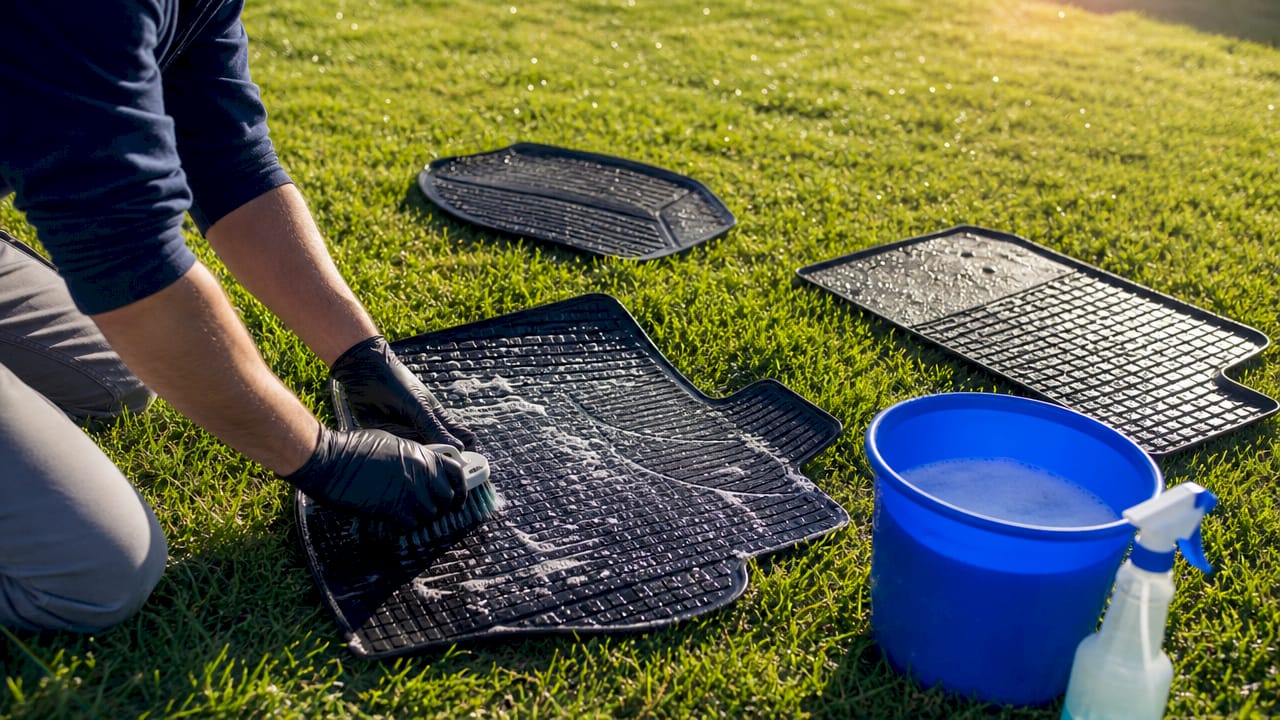
Using dedicated cleaners matched to each material is the single biggest factor separating a real detail from a basic wipe-down. Specialized products outperform general cleaners for every material type, reducing residue, staining, and long-term degradation.
Cleaning products by surface:
- Leather seats: pH-neutral leather cleaner plus a separate leather conditioner. Cleaning and protecting are two distinct steps. Separate treatments outperform all-in-one products for longevity and material care.
- Fabric and carpet: Dedicated upholstery shampoo or foam cleaner. For stubborn stains, hot-water extraction beats spray-and-wipe every time.
- Dashboard and vinyl: A gentle all-purpose cleaner diluted to low concentration. Finish with a matte protectant, not a glossy dressing.
- Interior glass: Ammonia-free glass cleaner only. Ammonia damages window tint and leaves streaks on treated glass.
- Steering wheel: A mild cleaner appropriate for the wheel material, whether leather, urethane, or alcantara. Never apply a slippery dressing to a steering wheel.
Tools you need:
- Vacuum with brush, crevice, and upholstery attachments
- Compressed air canister or electric air blower
- Detail brushes in two sizes: one for vents, one for console gaps
- Stiff carpet brush for agitating shampoo
- At least four microfiber towels (two for glass, two for surfaces)
- Spray bottles for diluted cleaners
Pro Tip: Label your spray bottles by surface type. Using a vinyl cleaner on leather by mistake is an easy error that causes real damage over time.
3. How often should you clean your vehicle interior?
Cleaning frequency depends directly on how you use your vehicle. A car that carries pets and kids every day needs a different schedule than one driven solo for commuting.
- Every 2–3 weeks: Routine vacuum and surface wipe-down. This prevents debris from grinding into carpet fibers and keeps odors from settling.
- Every 6–8 weeks: Deep detail for high-usage vehicles, especially those with pets or children eating inside. This session includes full shampoo, leather conditioning, and glass cleaning.
- Every 3–4 months: Major extraction and full interior detail. This is the session where you pull seats forward, clean seat tracks, and treat every surface with a protectant.
Regular maintenance does more than keep the cabin looking good. It prevents the kind of embedded grime that requires aggressive cleaning products, which can shorten the life of upholstery and trim. A consistent schedule also makes each session faster because you are maintaining a baseline rather than recovering from neglect.
For pet owners managing odor and hair, the 2–3 week routine is non-negotiable. Pet hair works into carpet backing quickly, and odors from pet dander bond to fabric fibers within days.
4. What mistakes should you avoid when cleaning your car interior?
The most common errors in DIY vehicle deep cleaning are not about skipping steps. They are about using the wrong products in the wrong amounts.
- Product overkill on controls. Heavy dressings on dashboards and steering wheels create glare and slippery surfaces. Detailing experts classify this as a safety hazard, not just an aesthetic problem.
- Skipping door jambs. A spotless cabin with dirty door jambs still feels unclean. Clean the jambs every time you detail the interior.
- Cleaning bottom-up. Dust and product mist fall downward. Always work from the headliner down to the floor.
- Using all-purpose cleaners on infotainment screens. Most touchscreens have anti-glare coatings that dissolve with alcohol or ammonia-based products. Use a dry or barely damp microfiber cloth only.
- Spray-and-wipe on carpet stains. Surface spraying pushes stain particles deeper into the carpet backing. Hot-water extraction pulls them out from below.
“A real detail goes beyond vacuuming and wiping. It requires extraction and deep crevice cleaning for best results.”
Avoiding these mistakes cuts your cleaning time and protects your interior investment. Most interior damage from cleaning comes from the wrong product, not from cleaning too often.
5. How to adjust your cleaning list for specific situations
Not every vehicle or owner has the same needs. Your car interior cleaning checklist should reflect your actual lifestyle and the materials in your cabin.
- Luxury or delicate materials: Alcantara, nubuck, and perforated leather require gentler products and less moisture. Use foam-based cleaners and blot rather than scrub. For luxury vehicle interiors, the wrong product can cause permanent discoloration.
- Pet owners: Focus on a two-pass vacuum (once with a brush attachment, once with a rubber nozzle to lift embedded hair) before any wet cleaning. Address odors with an eco-friendly odor removal workflow rather than masking sprays.
- Heavy food and drink stains: Apply a targeted enzyme-based stain remover and let it dwell for 5 minutes before agitating. Enzyme cleaners break down organic matter at the molecular level, which surface sprays cannot do.
- Eco-conscious owners: Non-toxic, biodegradable cleaners are now widely available and perform on par with conventional products for most surfaces. They are the right choice for enclosed spaces where ventilation is limited.
- Quick touch-ups vs. full details: Keep a small kit in your car with a microfiber towel, a spray bottle of diluted all-purpose cleaner, and a small brush. A 10-minute touch-up between full details prevents buildup from becoming a problem.
| Situation | Adjustment |
|---|---|
| Pets in vehicle | Two-pass vacuum, enzyme cleaner, odor treatment |
| Luxury materials | Foam cleaners, blot technique, matte protectants |
| Food and drink stains | Enzyme-based stain remover with 5-minute dwell time |
| Eco-conscious cleaning | Biodegradable, non-toxic products throughout |
| Quick maintenance | Microfiber, diluted cleaner, small brush kit in car |
Key takeaways
A structured vehicle interior cleaning list, built around a top-down sequence and material-matched products, is the most effective way to maintain cabin hygiene and protect interior surfaces long-term.
| Point | Details |
|---|---|
| Follow a top-down sequence | Clean from headliner to floor to avoid re-cleaning surfaces. |
| Match products to materials | Use pH-neutral leather cleaners, ammonia-free glass cleaners, and fabric shampoos separately. |
| Clean on a schedule | Routine wipe-down every 2–3 weeks; full detail every 6–8 weeks for high-use vehicles. |
| Avoid product overkill | Heavy dressings on steering wheels and dashboards create glare and safety hazards. |
| Don’t skip door jambs | Clean jambs every session to maintain a fully finished interior impression. |
What I have learned from following a strict cleaning list
After working with hundreds of vehicle interiors, the pattern is clear: owners who follow a written checklist get better results than those who clean by feel. The checklist removes the temptation to skip the headliner or rush past the door jambs because those areas “look fine.” They rarely do under good light.
The shift I have seen in recent years is toward eco-friendly products that actually work. Early biodegradable cleaners underperformed on embedded stains. The current generation does not. I now recommend them as the default for enclosed vehicle cabins, where chemical off-gassing from conventional products lingers far longer than most owners realize.
The other thing I tell every vehicle owner: do not wait until the interior smells bad to clean it. Odors from food, pets, and moisture bond to fabric and leather within days. By the time you notice a smell, the source has already embedded itself. A consistent cleaning schedule, paired with professional odor treatment when needed, keeps you ahead of that curve rather than chasing it.
The hardest habit to build is the 2–3 week routine vacuum. It feels unnecessary when the car looks clean. But that session is what prevents the 6-hour deep clean that becomes unavoidable after six months of skipping it.
— Master
When cleaning is not enough: professional odor removal
A thorough interior detail removes visible dirt and surface grime. But some odors, including tobacco, pet dander, mildew, and food, penetrate deep into foam padding and carpet backing where no vacuum or shampoo reaches.

Masterodorremoval specializes in the permanent elimination of those embedded odors using eco-friendly, green-certified methods that avoid ozone and chlorine treatments entirely. The service is available for vehicles, luxury cars, and high-end interiors with same or next-day scheduling. If your interior is clean but still carries a persistent smell, that is the problem Masterodorremoval is built to solve. Visit the odor removal specialists page to see available services and book a session.
FAQ
What is a vehicle interior cleaning list?
A vehicle interior cleaning list is a step-by-step checklist of every task, product, and tool needed to clean and protect all surfaces inside a car cabin. Professional detailers follow a 12-step sequence from debris removal to protective treatment.
How often should I deep clean my car interior?
Owners with pets or children eating in the vehicle should perform a deep detail every 6–8 weeks and a routine vacuum and wipe-down every 2–3 weeks. A major extraction session is recommended every 3–4 months.
What products should I use to clean car upholstery?
Use a dedicated fabric or upholstery shampoo for cloth seats and a pH-neutral leather cleaner followed by a conditioner for leather. All-purpose cleaners cause residue buildup and material degradation over time.
Why should I avoid ammonia-based glass cleaners in my car?
Ammonia damages window tint and leaves streaks on treated automotive glass. Ammonia-free glass cleaners deliver a streak-free finish without harming coatings or tint films.
Can cleaning products cause damage inside a vehicle?
Yes. Heavy dressings on steering wheels and dashboards create slippery surfaces and glare, which detailing experts classify as a safety hazard. Using all-purpose cleaners on infotainment screens dissolves anti-glare coatings permanently.
Recent Comments