
The smells you can’t find almost always trace back to the same short list: kitchen drains and garbage disposals, HVAC filters and duct returns, front-load washer gaskets, soft textiles like mattresses and upholstery, and hidden moisture behind walls or under floors. Persistent household odors consistently point to these reservoirs first. Start here and you’ll find the source faster than any air freshener will cover it.
Here’s the priority shortlist with an immediate next step for each:
- Kitchen drain/garbage disposal: Musty or sulfur-like smell near the sink. Pull the rubber flange, scrub it with a stiff brush, and flush with hot water and baking soda.
- Refrigerator door gasket: Sour or moldy smell when you open the fridge. Wipe the gasket folds with a diluted white vinegar solution; replace if cracked.
- Front-load washer gasket: Mildew smell in the laundry room. Pull back the rubber seal, clean visible mold, and leave the door open between cycles.
- HVAC filter and returns: Dusty or stale smell throughout multiple rooms. Replace the filter regularly, inspecting monthly and changing as needed. Vacuum the return grilles.
- Mattress and upholstery: Musty or body-odor smell that follows you room to room. Sprinkle baking soda, let it sit for several hours, then vacuum thoroughly.
- P-traps and floor drains: Sewer-like smell near a guest bathroom, utility sink, or basement floor drain. Pour water into the drain for 30 seconds to refill the trap.
- Hidden moisture or slow leaks: Persistent musty smell with no visible source. Use a moisture meter on walls and baseboards near plumbing; call a plumber if readings are elevated.
- Dryer vent and lint trap: Burning or dusty smell during a drying cycle. Clean the lint screen after every load; disconnect and vacuum the vent duct at least once a year.
- Dead pests in walls or attic: Sweet, sickly, decaying smell that intensifies over several days. Locate the area of strongest smell and call a pest control or restoration professional.
- New furniture VOC off-gassing: Chemical or “new car” smell from recently delivered furniture. Ventilate the room aggressively for several days; choose low-VOC-rated products when possible.
Safety note: A rotten-egg smell near a gas appliance, a burning or fishy smell near outlets, or any unknown fume that causes dizziness should prompt you to leave the space immediately and call your gas utility or 911. Some household fumes are genuinely hazardous, and mixing common cleaners like bleach and ammonia can produce toxic chloramine gas.
Table of Contents
- How to run a room-by-room audit and actually find the smell
- The full checklist: every overlooked odor source by room
- Why some household smells refuse to leave
- Maintenance routines that stop odors before they start
- When to call a professional and what they actually do
- How to manage odors from indoor plants and soil mold
- Seasonal and weather-related odor triggers
- Key Takeaways
- Permanent odor elimination without the guesswork
- Useful sources and further reading
How to run a room-by-room audit and actually find the smell
Masking an odor with a candle or spray tells you nothing about where it lives. Property maintenance experts consistently recommend a methodical audit over fragrance layering, because heavy scents make the original smell harder to isolate once they fade. Here’s how to do it right.
Step-by-step audit checklist:
- Start where the smell is strongest. Walk slowly through the home with the HVAC off. Your nose adapts quickly, so take breaks outside every few minutes to reset.
- Isolate HVAC influence. If the smell is present in multiple rooms simultaneously, the HVAC system is likely distributing it. Turn the system off and wait 15 minutes. If the smell weakens, start with filters, coils, and duct returns.
- Check drains and appliances. Start in kitchens and bathrooms — these are the most common origins. Sniff near each drain, under the sink, inside the dishwasher, and around the garbage disposal.
- Inspect soft surfaces. Press your face close to carpets, rugs, upholstered furniture, and mattresses. Organic odors in textiles are often faint at nose height but obvious up close.
- Check less-used drains and vents. Guest bathrooms, utility sinks, basement floor drains, and laundry room floor drains are frequently dry. Pour water into each one.
- Inspect the dryer vent, attic access, and crawlspace entry. Mold, lint buildup, and dead animals concentrate in these areas and are easy to miss.
Tools that help:
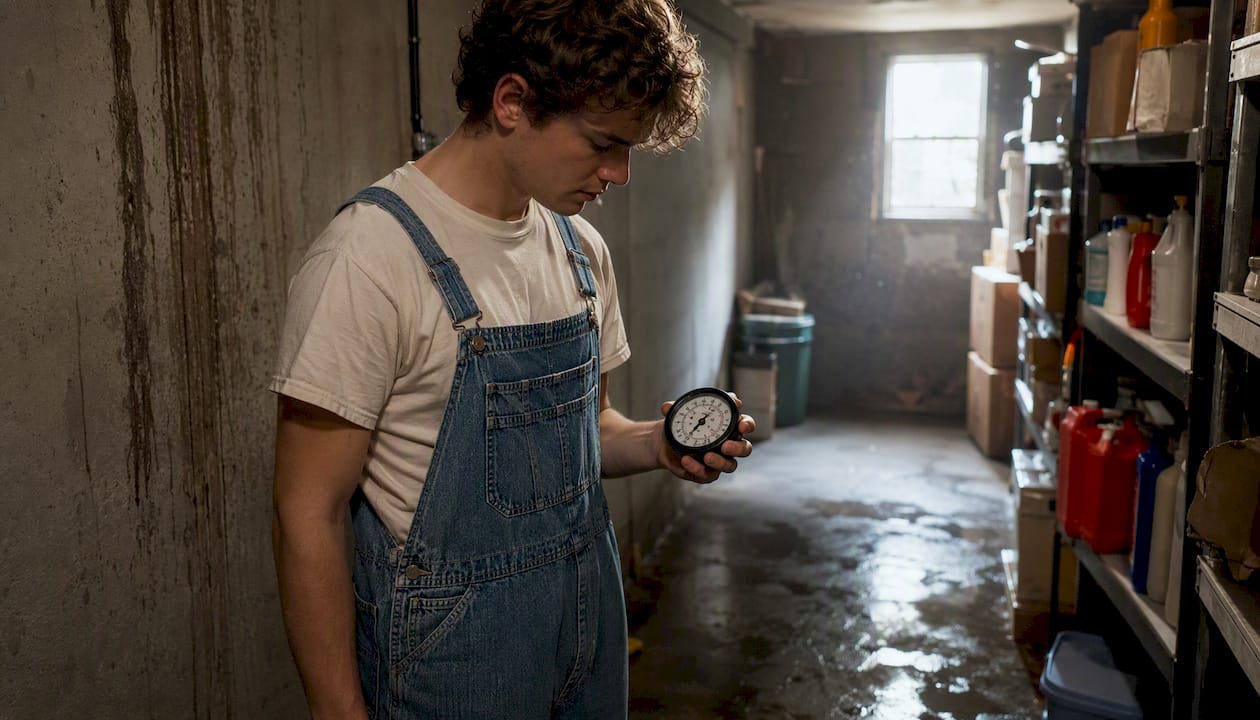
- Moisture meter: Detects hidden water in walls, floors, and ceilings without cutting drywall. Any reading above 20% in wood or 3% in concrete warrants further investigation.
- Flashlight and blacklight: A UV blacklight reveals dried urine stains on carpets, upholstery, and mattresses that are invisible in normal light. Use it in a darkened room.
- Basic gas detector: A handheld combustible gas detector (available at most hardware stores) confirms whether a rotten-egg smell is sewer gas or a natural gas leak. If it reads positive for gas, leave immediately.
Why you should avoid masking products during detection: Plug-in air fresheners and sprays temporarily suppress your ability to locate the source. Save them for after you’ve found and fixed the problem.
Triage questions to decide your next move:
- Is the smell constant or does it come and go? Intermittent smells often link to humidity, temperature, or HVAC cycles.
- Does it get stronger when it rains or the humidity rises? That points to mold or a dry P-trap.
- Is it stronger near vents or returns? HVAC distribution is the likely culprit.
- Did it start after new furniture arrived, a pest treatment, or a plumbing repair? Timing narrows the source fast.
If you can’t isolate the source after a full audit, a professional odor inspection covers areas most homeowners miss, including inside duct runs, under subflooring, and in wall cavities.
The full checklist: every overlooked odor source by room
The table below maps each source to its detection cues, a quick fix, a prevention schedule, and when to escalate. Use it alongside your audit.
| Location | Smell description | Immediate fix | Prevention schedule | Escalate when |
|---|---|---|---|---|
| Garbage disposal rubber flange | Sulfur, rotting food | Remove flange, scrub with brush and dish soap, flush with hot water | Weekly flush with ice and salt | Smell persists after cleaning; disposal hums but doesn’t spin |
| Refrigerator door gasket | Sour, moldy | Wipe folds with diluted white vinegar; dry thoroughly | Monthly inspection and wipe | Gasket is cracked or pulling away from door |
| Dishwasher filter | Fishy, stale food | Remove filter, rinse under hot water, scrub with a brush | Monthly cleaning | Filter is damaged or smell persists after cleaning |
| Under-fridge drip pan | Musty, sour | Pull fridge out, remove and wash drip pan | Every 3–6 months | Mold visible on pan or surrounding floor |
| Coffee maker water reservoir | Stale, slightly sour | Run a white vinegar descaling cycle, then two plain water cycles | Monthly descaling | Smell persists after two descaling cycles |
| Microwave interior | Burned food, grease | Wipe interior with a damp cloth and mild cleaner; steam-clean with a bowl of water and lemon | After every splatter | Smell is chemical or burning plastic |
| Shower and sink drains | Musty, sulfur | Pour boiling water, then baking soda and vinegar; scrub the stopper | Monthly flush | Slow drain or gurgling sounds alongside the smell |
| Dry P-trap (guest bath, floor drain) | Sewer gas | Pour water into the drain for 30 seconds | Run water in unused drains monthly | Smell returns within hours of pouring water |
| Toilet tank | Musty, stagnant | Add a few drops of white vinegar; scrub inside the tank | Every 6 months | Visible mold growth inside tank |
| Front-load washer gasket | Mildew | Pull back gasket, clean mold with diluted vinegar, dry completely | After every wash cycle, leave door open | Mold is deep in the gasket folds or smell is in clothing |
| Bathroom rugs | Musty, body odor | Wash in hot water with a cup of white vinegar | Weekly or bi-weekly washing | Rug padding is saturated; replace the rug |
| HVAC filter | Dusty, stale | Replace filter | Every 60 days; monthly inspection | Smell is present in all rooms simultaneously |
| HVAC coils and drain pan | Musty, mildew | Schedule professional coil cleaning | Annually | Visible mold on coils or standing water in drain pan |
| Duct deposits | Dusty, musty | Vacuum accessible registers; schedule duct cleaning | Every 3–5 years | Visible mold or pest evidence inside ducts |
| Carpets and carpet pad | Musty, pet odor | Sprinkle baking soda, let sit, vacuum; use enzymatic cleaner for pet spots | Annual deep extraction | Smell returns within hours; pad is saturated |
| Area rugs | Musty, damp | Take outside, beat, air-dry in sunlight | Twice-yearly deep cleaning | Backing is moldy or smell persists after cleaning |
| Upholstered furniture | Body odor, pet, musty | Sprinkle baking soda, vacuum; use enzymatic cleaner | Annual professional extraction | Smell is inside the stuffing; professional extraction needed |
| Mattress | Body odor, musty | Baking soda treatment; air in sunlight if possible | Rotate every 6 months; deep clean annually | Smell is deep in the foam; consider replacement |
| Closets and shoe storage | Foot odor, musty | Remove shoes, air closet, use activated charcoal sachets | Monthly airing; replace sachets quarterly | Mold visible on walls or floor of closet |
| Dryer vent and lint trap | Burning, dusty | Clean lint screen after every load; vacuum duct annually | Annual duct inspection | Drying times are increasing; vent flap doesn’t open freely |
| Crawlspace or attic | Musty, earthy, ammonia | Improve ventilation; check for standing water or pest evidence | Annual inspection | Visible mold, standing water, or rodent evidence |
| Walls and subflooring (slow leak) | Persistent musty | Use moisture meter to locate; fix the leak source | Annual plumbing check | Moisture reading above 20%; visible staining on walls |
| Dead rodent in wall or attic | Sweet, sickly, decaying | Locate area of strongest smell; call pest control | Seal entry points annually | Smell intensifies over days; pest control required |
| New furniture / pressed wood | Chemical, “new car” | Open windows; ventilate room for several days | Choose low-VOC products; air new items in garage first | Headaches or dizziness; remove item and consult a pro |
| Pet litter box | Ammonia, feces | Scoop daily; full litter change twice weekly | Weekly full clean; monthly box replacement | Odor persists after cleaning; box is cracked and absorbing odor |
| Pet bedding | Musty, pet odor | Wash in hot water with enzymatic detergent | Weekly washing | Odor in the stuffing; replace bedding |
| Sponges and dishcloths | Sour, mildew | Microwave damp sponge for 2 minutes; replace weekly | Replace sponges weekly | Any persistent sour smell after microwaving |
| Range hood filter | Grease, stale cooking | Soak in hot water and dish soap; scrub | Monthly cleaning | Filter is warped or grease is dripping |
| Indoor plant soil | Earthy, sour, rotten | Check for overwatering; repot if soil is waterlogged | Water only when top inch of soil is dry | Fungus gnats present; white mold on soil surface |
Why some household smells refuse to leave
Not all odors respond to a good cleaning. The ones that keep coming back share a common trait: they’ve moved past the surface and into the material itself.
- Tobacco and smoke: Smoke particles are ultrafine and penetrate drywall, insulation, carpet padding, and wood framing. Nicotine also reacts with indoor air compounds to form carcinogenic thirdhand smoke residue that clings to surfaces long after the smoke is gone. Surface wiping does almost nothing.
- Deep pet urine: Urine soaks through carpet fibers into the pad and then into the subfloor. Once uric acid crystals dry and bond to wood or concrete, they reactivate with humidity and release odor repeatedly. Enzymatic cleaners help at the surface level; saturated padding and subfloor sections often need replacement.
- Decomposing animals: A dead rodent or bird inside a wall cavity releases gases and fluids that absorb into surrounding insulation and drywall. The smell peaks around 7–10 days and can linger for weeks even after the carcass is removed, because the surrounding material is contaminated.
- Long-soaked mildew: Mold growth in building materials is not just a surface problem. Mold hyphae penetrate porous materials like drywall and wood, and surface cleaning with bleach kills only what’s visible. The smell returns because the colony continues growing inside the material.
- Oil-based kitchen grease: Grease polymerizes over time on range hood filters, cabinet surfaces, and inside duct runs. It becomes a sticky film that traps food particles and bacteria, producing a persistent rancid smell that survives standard wiping.
- VOCs from new furniture: Pressed wood and adhesives off-gas volatile organic compounds for months after manufacture. The compounds adsorb onto soft furnishings and walls, meaning the smell spreads beyond the original piece. Prolonged exposure can cause headaches and dizziness in sensitive individuals.
The key distinction is absorption vs. surface contamination. A smell that lives on a hard, non-porous surface responds to cleaning. A smell that has absorbed into carpet padding, upholstery stuffing, drywall, or insulation requires extraction, material replacement, or professional neutralization at the molecular level.
This is the point where most DIY attempts stall. Repeated surface cleaning creates the illusion of progress while the actual source continues off-gassing from inside the material.
Maintenance routines that stop odors before they start
Most persistent household smells develop because a small reservoir (a gasket, a filter, a drain) goes unchecked for months.
Weekly tasks:
- Scoop the litter box daily; do a full litter change twice a week.
- Replace kitchen sponges and wash dishcloths in hot water.
- Wipe down the stovetop and range hood exterior after cooking.
- Leave the front-load washer door and detergent drawer open after every cycle.
Monthly tasks:
- Run water for 30 seconds into every seldom-used drain (guest bath, utility sink, basement floor drain) to refill P-traps.
- Clean the dishwasher filter and the garbage disposal rubber flange.
- Inspect and wipe the refrigerator door gasket.
- Descale the coffee maker with a white vinegar cycle.
- Check and replace the HVAC filter regularly when it appears dirty…
Quarterly tasks:
- Wash bathroom rugs and pet bedding in hot water with enzymatic detergent.
- Clean the range hood filter by soaking in hot, soapy water.
- Vacuum upholstered furniture and apply baking soda treatment to mattresses.
- Replace activated charcoal sachets in closets and shoe storage.
Annual tasks:
- Schedule a professional dryer vent cleaning or do it yourself with a vent brush kit.
- Deep-clean or professionally extract carpets and area rugs.
- Inspect the crawlspace and attic for moisture, mold, or pest evidence.
- Have HVAC coils and drain pans inspected and cleaned.
- Check all plumbing connections under sinks and behind appliances with a moisture meter.
For a full sustainable prevention schedule tailored to rental and commercial properties, the routines above scale directly to multi-unit management.
Product categories worth having on hand:
- Microbial drain cleaners for monthly drain maintenance. They consume the biofilm that builds up in P-traps and drain pipes.
- HEPA vacuum for carpets, upholstery, and mattresses. Standard vacuums recirculate fine particles; a HEPA filter captures them.
- Activated charcoal sachets for closets, shoe storage, and small enclosed spaces.
- Dehumidifier for basements, crawlspaces, and laundry rooms during humid months. Keeping relative humidity below 50% is one of the most effective mold-prevention steps you can take.
Seasonal adjustments:
- Spring and summer: Rising humidity reactivates dormant mold and dry P-traps. Run dehumidifiers, increase drain-flushing frequency, and check crawlspace ventilation.
- Fall: Heating season starts. Clean radiators and baseboard heaters before first use; dust and debris burn off and create a brief but noticeable smell.
- Winter: Homes are sealed tight, so VOCs and cooking odors concentrate. Ventilate briefly when cooking and check that bathroom exhaust fans are actually venting outside (not into the attic).
When to call a professional and what they actually do
Some odors are beyond what a cleaning routine can fix. Knowing when to stop DIYing saves time and, in a few cases, protects your health.
Red flags that require a professional:
- A rotten-egg smell near gas appliances or in the basement. This could be a gas leak or sewer gas. Leave the building and call your gas utility or 911 before calling an odor pro.
- A burning or fishy smell near electrical outlets or panels. This is a potential electrical fault. Call an electrician first.
- A persistent musty smell after repeated cleaning, especially if it’s stronger after rain or in humid weather. Hidden mold in walls or subflooring needs professional assessment.
- Widespread smoke contamination from a fire, even a small one. Smoke penetrates deeply into building materials and requires professional extraction.
- A suspected dead animal inside a wall, ceiling, or attic. Removal and decontamination of surrounding materials is not a DIY job.
- Recurrent pet urine saturation in carpet, padding, or subfloor. Once the subfloor is involved, extraction and possible replacement are the only permanent solutions.
What a professional odor removal visit looks like:
- Full inspection: The technician checks HVAC components, duct runs, hidden moisture points, and soft surfaces. A professional inspection covers areas most homeowners can’t easily access, including inside wall cavities and under subflooring.
- Source identification and documentation: The technician notes the location, intensity, and likely cause of each odor source before any treatment begins.
- Targeted extraction or neutralization: Depending on the source, this may involve hot-water extraction for textiles, enzyme treatment for organic odors, or molecular neutralization for smoke and VOCs. The goal is to address the odor-causing molecules, not cover them.
- Material assessment: The technician identifies whether any materials (carpet pad, drywall, insulation) need replacement rather than treatment.
- Verification: A post-treatment check confirms the odor is gone, not suppressed.
Before your appointment, document the following:
- Where the smell is strongest (room, height, near which fixtures)
- When it started and whether it’s constant or intermittent
- Any patterns (stronger after rain, during HVAC cycles, after cooking)
- Photos of visible stains, mold, or water damage
- A list of DIY steps already attempted
Pro Tip: Ask specifically about green-certified, non-ozone, non-chlorine methods. Ozone treatments can damage rubber seals, electronics, and fabrics, and require full evacuation of the space. Request a written scope that describes extraction and neutralization steps rather than just “odor treatment.” A home inspection checklist can help you frame the right questions before the pro arrives.
For property managers, the red flags that warrant immediate professional attention overlap significantly with the list above, particularly around moisture, mold, and structural contamination.
How to manage odors from indoor plants and soil mold
Indoor plants are a surprisingly common and frequently overlooked odor source. The smell usually isn’t the plant itself — it’s the soil.
Overwatered soil creates anaerobic conditions where bacteria thrive and produce hydrogen sulfide and other sulfur compounds, which smell like rotten eggs or sewage. The fix is almost always the same: let the soil dry out completely between waterings. A good rule of thumb is to water only when the top inch of soil is dry to the touch.
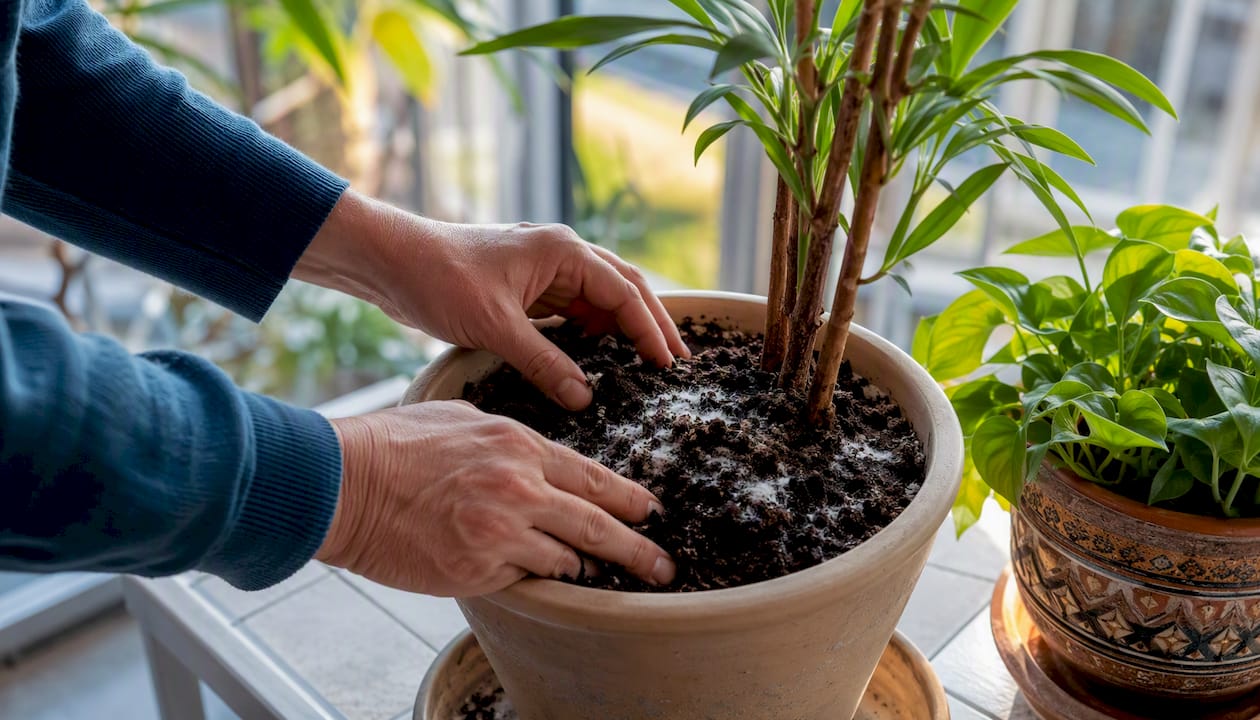
White mold on the soil surface is a separate issue. It’s typically a saprophytic fungus feeding on organic matter in the potting mix, and while it’s not usually harmful to the plant or humans, it does produce a musty smell. Scrape off the visible mold, reduce watering frequency, and improve air circulation around the pot. Repotting into fresh, well-draining mix with added perlite solves most cases permanently.
Fungus gnats are a reliable sign that soil is staying too wet. They don’t cause the odor directly, but their presence confirms the overwatering that does. A layer of coarse sand or perlite on top of the soil discourages egg-laying and helps the surface dry faster.
A few other plant-related odor sources worth checking: saucers that hold standing water for more than a day, decorative moss or bark mulch that stays damp and grows mold, and the drainage holes at the bottom of pots where organic matter accumulates. Empty saucers after watering and clean pot exteriors monthly.
Seasonal and weather-related odor triggers
Weather changes don’t just affect comfort. They directly activate odors that were dormant or undetectable under different conditions.
Spring and early summer bring rising humidity, which is the single biggest seasonal odor trigger. Humidity reactivates dried urine crystals in carpet and upholstery, feeds mold colonies that were dormant through winter, and causes dry P-traps to become noticeable as windows open and air circulation changes. If your home smells musty every spring, the source is almost certainly a moisture-related reservoir that needs attention before humidity peaks.
Summer concentrates cooking and food odors because homes are often sealed with air conditioning running. Trash cans, garbage disposals, and refrigerator gaskets become more active odor sources in heat. Garbage left in a sealed, air-conditioned kitchen still decomposes faster than most people expect.
Fall brings the first use of heating systems after months of dormancy. Dust, debris, and any organic matter that settled in duct runs and on heating elements burns off when the heat first kicks on. The smell is usually brief but can be alarming. Running the system for 30–60 minutes with windows cracked before the season starts clears most of it.
Winter is the season of concentrated indoor air. Homes are sealed tight, ventilation drops, and VOCs from furniture, cleaning products, and building materials accumulate. Cooking smells linger longer. Pet odors become more noticeable. The practical response is brief, intentional ventilation during and after cooking, and keeping bathroom exhaust fans running for at least 15 minutes after showers.
Rain and high humidity specifically reactivate hidden mold. If you notice a musty smell that appears after rain and fades as the weather dries, there’s almost certainly a moisture intrusion point somewhere in the structure. A moisture meter and a systematic check of exterior walls, window frames, and the crawlspace will usually locate it.
Key Takeaways
The most overlooked odor sources in any home are almost always in the same short list: kitchen drains, HVAC filters, front-load washer gaskets, soft textiles, and hidden moisture reservoirs.
| Point | Details |
|---|---|
| Start with high-probability spots | Kitchen drains, HVAC filters, front-load washer gaskets, and P-traps account for most persistent household odors. |
| Masking delays diagnosis | Fragrance sprays and plug-ins suppress your ability to locate the source; audit first, then treat. |
| Porous materials need extraction | If a smell returns within hours of cleaning, the source is inside a material (padding, drywall, insulation) and needs extraction or replacement. |
| Prevention is a calendar | Monthly drain flushing, filter checks, and gasket cleaning prevent most recurring odors before they develop. |
| Masterodorremoval for stubborn cases | When DIY fails, Masterodorremoval provides eco-friendly, green-certified odor elimination using molecular neutralization rather than masking. |
The case for diagnosis over deodorizing
Most people reach for a spray before they reach for a flashlight. That instinct is understandable, but it’s exactly why so many household odors persist for months or years. The smell isn’t the problem. It’s a signal from a specific source, and covering it delays the fix.
What experience with hidden odor sources makes clear is that the most stubborn cases almost always involve a material that absorbed the odor rather than a surface that simply needs cleaning. Smoke in drywall, urine in subfloor wood, mold in insulation — these don’t respond to surface treatment because the contamination isn’t at the surface. The right approach is to find the source first, assess whether it’s a surface or absorption problem, and then choose the appropriate method: clean, extract, replace, or neutralize at the molecular level.
Eco-friendly methods matter here for a practical reason, not just an environmental one. Ozone treatments, for example, can damage rubber seals, electronics, and fabrics, and they require full evacuation of the space. Green-certified, non-ozone, non-chlorine approaches treat the odor without creating a secondary problem. That’s the standard worth asking for, whether you’re handling it yourself or bringing in a professional.
Permanent odor elimination without the guesswork
When the audit is done and the source is identified, the next question is whether the fix is within DIY reach or whether the contamination has gone deep enough to need professional treatment. For smoke, deep pet urine, mold in structural materials, or any odor that survives repeated cleaning, professional extraction and molecular neutralization are the only approaches that hold.

Masterodorremoval specializes in permanent, eco-friendly odor elimination for homes, rental properties, vehicles, yachts, and commercial spaces. The process starts with a full inspection that covers HVAC components, hidden moisture points, soft surfaces, and structural areas most homeowners can’t easily access. Treatment targets the odor-causing molecules directly, using green-certified methods that avoid ozone and chlorine. No masking, no residual chemical smell, no damage to materials.
For property managers dealing with tenant turnover, smoke contamination, or recurring pet odors, Masterodorremoval offers same or next-day availability and written verification of results. For homeowners who’ve tried everything and the smell keeps coming back, the green odor elimination process is the step that actually ends it. Request an inspection or quote directly through the website to get a clear scope and timeline for your specific situation.
Useful sources and further reading
- ATSDR: Frequently Asked Questions About Indoor Odors — The Agency for Toxic Substances and Disease Registry’s overview of indoor odor health implications and when to seek professional assessment.
- CDC: Mold and Health — The CDC’s guidance on mold in buildings, health effects, and remediation standards.
- Poison Control: Identifying Unknown Fumes in Your Home — Practical guidance on hazardous household fumes, chemical reactions to avoid, and when to evacuate.
- Chicago Home Inspector: Common Home Odors and What They Mean — An inspector’s breakdown of common household smells and their likely structural or mechanical causes.
- Masterodorremoval: 10 Issues to Ask During a Home Inspection — A practical checklist mapping common odor causes to inspection questions for homeowners and agents.
- Masterodorremoval: Habits That Reduce Indoor Odors — Maintenance routines and calendar tips for reducing recurring household odors.
- Masterodorremoval: Safe Interior Odor Cleaning Process for Homeowners — Step-by-step explanation of on-site professional treatment protocols and safety standards.
Recommended
- 10 Issues To Ask During a Home Inspection That Can Cause Odor Issues – Master Odor Removal
- Eliminate common household odors: 5 eco-friendly fixes – Master Odor Removal
- Habits That Reduce Indoor Odors: Your 2026 Guide – Master Odor Removal
- Top 9 ways to prevent odors in properties sustainably – Master Odor Removal
Recent Comments