
TL;DR:
- A systematic approach to move-in odor checks involves safety triage, short-term mitigation, and detailed odor logging to identify sources. Critical safety odors like gas or burning smells demand immediate evacuation and emergency calls, while others require ventilation and documentation before investigation. Professional tools and source removal methods ensure odors are permanently eliminated rather than masked, emphasizing validation and green-certified techniques.
Every move-in odor check should start with a three-part triage: rule out safety hazards first, take short-term steps to limit exposure and preserve evidence, then run an odor log for several days to pinpoint the source before spending a dollar on treatment. That sequence is what separates a resolved problem from a recurring complaint.
Here’s the rapid checklist for the first 30 minutes on site:
- Safety triage: Sniff for rotten eggs, sewage, burning, or sharp chemical smells. Any of those means ventilate immediately and consider evacuating. Carbon monoxide has no odor at all, so test detectors regardless.
- Ventilate and isolate: Open exterior windows and doors. Keep interior doors closed so you don’t spread the odor through the building or vehicle.
- Stop HVAC distribution: Switch the central system to fan-off so odors don’t travel through ductwork before you know the source.
- Document before you disturb: Photograph the space, note the odor type and strength, and resist the urge to clean or deodorize until you have a baseline.
- Start your odor log: Record date, time, weather, HVAC status, and odor intensity. Keep entries for 5–7 days. Patterns in that log will tell you more than a single walkthrough ever could.
For real estate agents, auto dealerships, and hospitality operators, this move-in odor inspection sequence is the foundation of every professional property assessment.
Table of Contents
- What odors at move-in are actually safety emergencies?
- How to limit exposure and preserve evidence in the first hours
- How do you map and document an odor systematically?
- What tools do professionals use to find hidden odors?
- What actually removes odors versus what just masks them?
- When should you call a professional, and what should you ask them?
- Key Takeaways
- How Masterodorremoval approaches a move-in odor check
- Masterodorremoval: professional odor removal when the source won’t stay gone
- Sources and further reading
What odors at move-in are actually safety emergencies?
Not every bad smell is a crisis, but some are. The rule is simple: treat the following as urgent until proven otherwise.
Rotten egg or sulfur smell points to natural gas or sewer gas. Leave the building, avoid switches or open flames, and call your gas utility or 911 from outside. Do not re-enter until cleared.
Burning or electrical smell suggests overheating wiring or an appliance failure. Shut off power at the breaker only if it’s safe to do so, then evacuate and call emergency services.
Sharp chemical or solvent smell can indicate a VOC leak, cleaning product residue, or off-gassing from new materials. Ventilate immediately and call Poison Control at 1-800-222-1222 for free 24/7 guidance on unknown fumes. The American Association of Poison Control Centers operates that line around the clock.
Carbon monoxide is the hazard that catches people off guard because it has no smell at all. Test every CO detector on arrival. If any detector is missing or non-functional, document it immediately and notify the property owner in writing before occupancy.
Pro Tip: Bring a fresh nose. If you’ve been in the space for more than 15 minutes, step outside and let someone who hasn’t been inside do the next sniff check. Nose-blindness is real and it causes professionals to miss odors that a new occupant will notice immediately.
How to limit exposure and preserve evidence in the first hours
Once safety is confirmed, the goal shifts to two things: stop the odor from spreading and keep the investigative clues intact.
- Open exterior windows and doors in the affected area only. Avoid opening interior doors between rooms or between a vehicle cabin and trunk, since airflow carries odors and makes source localization harder.
- Set HVAC to fan-off. Running the system distributes odors through ductwork and can contaminate clean zones. The exception: if you suspect gas, follow utility provider instructions, which may include leaving ventilation running.
- Remove obvious sources with documentation first. Trash, spoiled food, and wet materials are common culprits. Photograph them in place before moving anything. A practical move-in checklist includes checking under sinks, inside appliances, and behind furniture before assuming the odor is structural.
- Run water in P-traps. Rarely used drains dry out and allow sewer gas to enter. Run water for 20–30 seconds in every sink, shower, and floor drain.
- Check appliance cavities. Dishwasher filters, garbage disposal areas, and refrigerator drip trays are high-risk odor zones that get overlooked on standard walkthroughs.
- Note everything in your odor log. Time, weather, HVAC status, what you removed, and what changed. This record becomes the technician’s starting point if you escalate.
How do you map and document an odor systematically?
A single walkthrough rarely identifies the source. The FACS building odor investigation protocol recommends keeping a log with dates, times, and weather conditions for 5–7 days because many odors are intermittent and tied to temperature, humidity, or equipment cycles.
Start by collecting history. Ask about prior water intrusion, recent cleaning products used, occupancy changes, new equipment, and any past odor complaints. That context narrows the hypothesis list before you take a single reading.
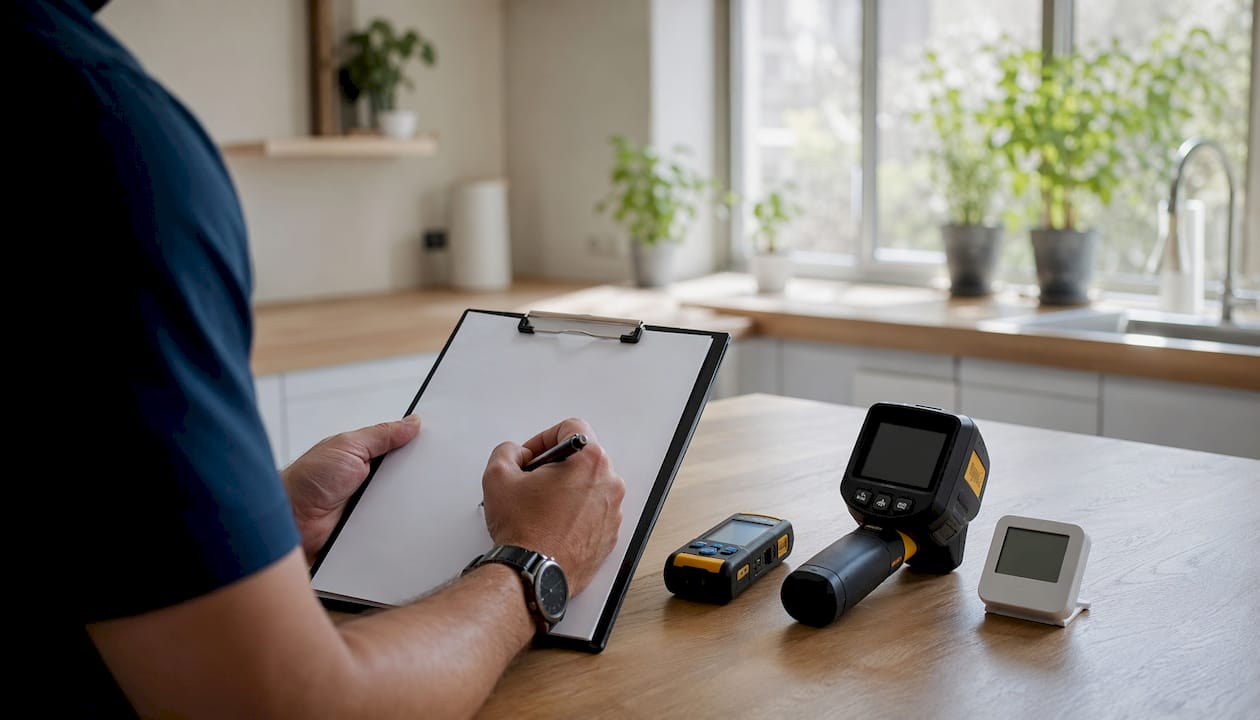
Then build your odor map using this structure:
| Field | What to record |
|---|---|
| Date and time | When the odor was noticed |
| Location | Room, zone, or surface where it’s strongest |
| Intensity | Relative strength compared to previous entries |
| Weather and humidity | Temperature, rain, wind direction |
| HVAC status | On, off, heating, cooling, fan-only |
| Activities | Cooking, cleaning, occupancy, recent work |
| Hypothesis | Suspected source based on that entry |
After several days, patterns emerge. An odor that spikes when the HVAC runs points to duct contamination. One that appears only after rain suggests moisture intrusion. An odor log like this is standard practice among professional investigators and gives any remediation technician a documented starting point rather than a guess.
For auto dealerships, the same logic applies to vehicle assessments. Odors tied to cabin air recirculation, HVAC evaporator mold, or seat foam saturation follow predictable patterns that a log will surface faster than repeated sniff tests.
What tools do professionals use to find hidden odors?
Surface-level inspection misses the majority of persistent odor sources. Pros use instruments because odors often originate behind walls, under flooring, or inside ductwork where no visual check reaches.
- Moisture meters detect hidden dampness behind drywall and under flooring. Elevated moisture readings in areas with no visible water damage are a primary indicator of mold or mildew odors.
- Thermal imaging cameras reveal temperature differentials that point to moisture intrusion or concealed voids. A cold spot behind a wall in summer often means wet insulation.
- Hygrometers track relative humidity. Sustained humidity above 60% creates conditions where mold grows and odors persist even after surface cleaning.
- HVAC duct inspection and air sampling identify distribution paths. If the smell is strongest at a supply vent, the HVAC system is a distribution source, not necessarily the origin point. Tracing back to the air handler or return plenum often reveals the true contamination zone.
- Air and surface sampling sent to a lab confirms mold, VOCs, or particulate sources when visual and instrument readings are inconclusive. This step matters when health concerns exist or when a client needs documented proof before a remediation scope is approved.
The combination of moisture meter, thermal camera, and hygrometer is what separates a professional property odor assessment from a walkthrough with a good nose.
What actually removes odors versus what just masks them?
Cleaning alone rarely solves structural or system-sourced odors. The IICRC is clear on this: odors tied to mold, tobacco saturation, or HVAC contamination require source removal, not surface treatment.
Permanent remediation targets the source directly:
- Mold remediation removes contaminated materials and treats affected surfaces with EPA-registered antimicrobials.
- Material replacement for carpet, padding, drywall, or insulation saturated with pet urine, tobacco, or mildew.
- HVAC decontamination cleans coils, drain pans, and ductwork when the system is the distribution path.
- Enzyme or oxidative neutralization breaks down odor-causing compounds at the molecular level rather than covering them.
Heavy fragrance and air fresheners are the red flag to watch for. Masking often signals deeper contamination — tobacco, pet urine, or mildew that will re-emerge once the masking agents dissipate. When you walk into a unit or vehicle and the first thing you notice is three plug-in air fresheners, treat that as evidence of a problem, not a solution.
Pro Tip: Turn off mechanical ventilation briefly during your initial detection pass. Air movement dilutes and distributes odors, which can create false negatives and send you chasing the wrong zone.
When should you call a professional, and what should you ask them?
Escalate to a professional when any of these conditions apply:
- A safety hazard is suspected and has not been fully ruled out.
- The source remains hidden after basic checks and a full odor log.
- Odors return within days of cleaning or surface treatment.
- HVAC or structural contamination is likely based on instrument readings or log patterns.
- A client, guest, or buyer reports symptoms (headache, eye irritation, respiratory discomfort).
When you’re evaluating vendors, ask these questions directly:
- Are your technicians licensed and insured?
- Do you use non-ozone, non-chlorine treatment methods?
- Are your products green-certified or eco-safe?
- What instruments do you use (moisture meters, thermal imaging, air sampling)?
- What is your response time, and do you offer same- or next-day availability?
- Can you provide documented case studies or before/after validation results?
- What does your scope include, and how do you confirm the odor is resolved?
A vendor who can’t answer the instruments question or won’t commit to validation testing is offering cleaning, not remediation. For dealerships managing trade-in inventory or agents preparing listings, that distinction directly affects whether the problem comes back before closing.
Key Takeaways
A professional move-in odor check requires safety triage, short-term mitigation, systematic logging, and source-targeted remediation to resolve odors permanently rather than temporarily.
| Point | Details |
|---|---|
| Safety triage comes first | Evacuate for rotten-egg, burning, or chemical smells; call 1-800-222-1222 for unknown fumes. |
| Stop HVAC distribution immediately | Fan-off prevents odors from spreading through ductwork before the source is identified. |
| Run a 5–7 day odor log | Recording time, weather, and HVAC status for 5–7 days reveals patterns no single walkthrough catches. |
| Masking is a red flag | Heavy fragrance signals deeper contamination; permanent fixes require source removal, not surface treatment. |
| Masterodorremoval for escalation | When the source is hidden or returning, Masterodorremoval provides licensed technicians, green-certified methods, and same- or next-day response. |
How Masterodorremoval approaches a move-in odor check
The instinct most professionals have is to clean first and investigate later. That sequence almost always costs more in the long run. By the time a persistent odor resurfaces after a cleaning, the source has had more time to saturate materials, and the remediation scope grows.
Masterodorremoval’s workflow runs in the opposite direction: safety triage first, then targeted investigation using moisture meters and thermal imaging to locate the source before any treatment begins. Source removal or material replacement comes next, followed by validation testing and client sign-off. That last step, documented proof that the odor is gone, is what protects a real estate agent’s reputation, a dealership’s inventory value, and a hotel’s guest reviews.
The methods are green-certified and explicitly avoid ozone and chlorine treatments, which matters for hospitality operators managing occupied spaces and dealerships with vehicles that need to be ready for a test drive, not airing out. Licensed technicians, same- or next-day availability, and a clear scope with follow-up testing are the standard, not the exception.
Masterodorremoval: professional odor removal when the source won’t stay gone
When a property or vehicle has an odor that cleaning hasn’t resolved, the problem is almost always structural or system-sourced. That’s where Masterodorremoval’s commercial odor removal services are built to step in: licensed technicians, green-certified methods, and instrumentation-backed investigation for vehicles, residential properties, hotels, Airbnbs, and commercial spaces.

Same- or next-day availability means a dealership doesn’t lose a sale day, an agent doesn’t delay a listing, and a hotel doesn’t comp a room twice. Every job includes validation testing so you have documented proof the odor is resolved, not just masked. Services cover tobacco, marijuana, pet, mildew, food, and smoke odors across any interior environment.
Contact Masterodorremoval for an on-site assessment. Bring your odor log if you’ve started one — it speeds triage and gets the technician to the source faster. Review service-level terms and guarantees before booking so you know exactly what validation looks like at sign-off.
Sources and further reading
- American Association of Poison Control Centers: 1-800-222-1222 for unknown fumes
- FACS: IEQ Odor Investigation Procedures and the 5–7 day odor log approach
- Inspectapedia: Building odor diagnosis checklist and odor log template
- REDI Restoration: How to identify an odor source, including HVAC tracing and air sampling
- ATSDR: Environmental odors, exposure reduction, and the “What is that odor?” identification tool
- LegalClarity: Rental move-in checklist, documenting mold, moisture, and detector status
- IICRC: Industry credentialing and best practices for odor and moisture remediation
Recent Comments