
TL;DR:
- Cleaning luxury vehicle interiors requires using material-specific, pH-neutral cleaners to prevent damage to delicate surfaces. A structured top-to-bottom workflow and regular maintenance protect bespoke materials and keep the cabin looking factory-new.
Cleaning luxury vehicle interiors requires material-specific methods, pH-balanced cleaners, and tools designed for delicate surfaces. Standard car cleaning products destroy piano black trim, wood veneer, and Nappa leather. Professional interior detailing, the industry term for this process, goes far beyond a wipe-down. It demands a structured workflow, the right chemistry, and patience. This guide covers exactly how to clean luxury interiors safely, from tool selection to a maintenance schedule that keeps your cabin looking factory-new.
What tools and products do you need for luxury interior detailing?
The right tools define the outcome before you apply a single drop of cleaner. A vacuum with crevice and brush attachments pulls dirt from seams and vents without scratching surfaces. Soft-bristle brushes and microfiber towels are the two non-negotiable tools for any luxury auto interior cleaning workflow. Stiff bristles and beater bars cause micro-scratches on alcantara, carbon fiber, and gloss trim.
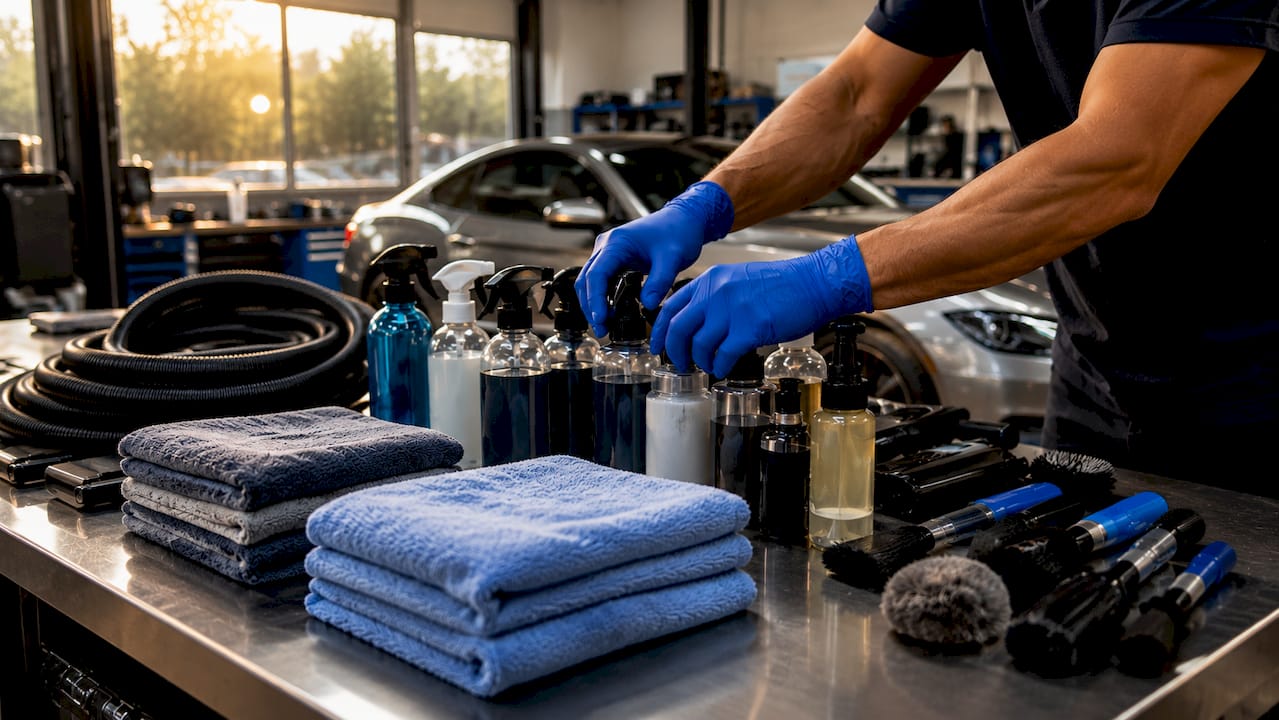
Product selection is equally critical. Household cleaners damage luxury trims including piano black, aluminum, and wood veneer through etching and chemical deterioration. Only pH-neutral, material-specific cleaners are safe for these surfaces. Avoid anything with ammonia, bleach, or high alkalinity.
| Cleaner Type | Suitable Materials | Avoid On |
|---|---|---|
| pH-neutral leather cleaner | Nappa leather, semi-aniline leather | Alcantara, fabric |
| Fabric upholstery cleaner | Cloth seats, carpets | Leather, wood trim |
| Plastic and trim cleaner | Matte plastics, soft-touch panels | Piano black, gloss trim |
| Wood veneer safe cleaner | Real and synthetic wood trim | Leather, fabric |
| Matte-finish conditioner | Matte plastics, matte leather | Gloss surfaces |
Silicone-based dressings are a common mistake. Matte-finish conditioners prevent glare and avoid the dust-attracting residue that shiny dressings leave behind. A silicone product on a matte dashboard creates a permanent sheen that cannot be reversed without professional correction.
Pro Tip: Always test any new cleaner on a hidden area first, such as the underside of a seat bolster or the back of a door panel. Bespoke materials like hand-stitched leather and open-pore wood react unpredictably to unfamiliar chemistry.
How to clean luxury vehicle interiors: the step-by-step workflow
Professional detailers follow a top-to-bottom cleaning sequence starting at the headliner and finishing at the carpets. This order prevents recontamination. Cleaning the carpets first and then brushing debris off the dashboard undoes your work immediately.
Follow this sequence for a complete luxury vehicle detailing checklist:
- Headliner. Mist a clean microfiber towel lightly and dab gently. Never spray liquid directly onto the headliner. Saturating a foam-backed headliner dissolves the adhesive and causes sagging that requires full replacement.
- Windows and glass. Use an ammonia-free glass cleaner on a folded microfiber towel. Wipe in overlapping strokes to avoid streaks on tinted glass.
- Dashboard and instrument cluster. Apply a pH-neutral trim cleaner to a soft-bristle brush, not directly to the surface. Work the brush into vents and around buttons, then wipe residue with a dry microfiber towel.
- Piano black and gloss trim. Use a dedicated gloss trim cleaner and a lint-free microfiber applicator. Piano black shows every swirl mark, so use zero pressure and straight-line strokes only.
- Wood veneer and aluminum trim. Apply a wood-safe cleaner sparingly. Wipe with the grain on real wood. Avoid pooling liquid near seams where veneer meets plastic.
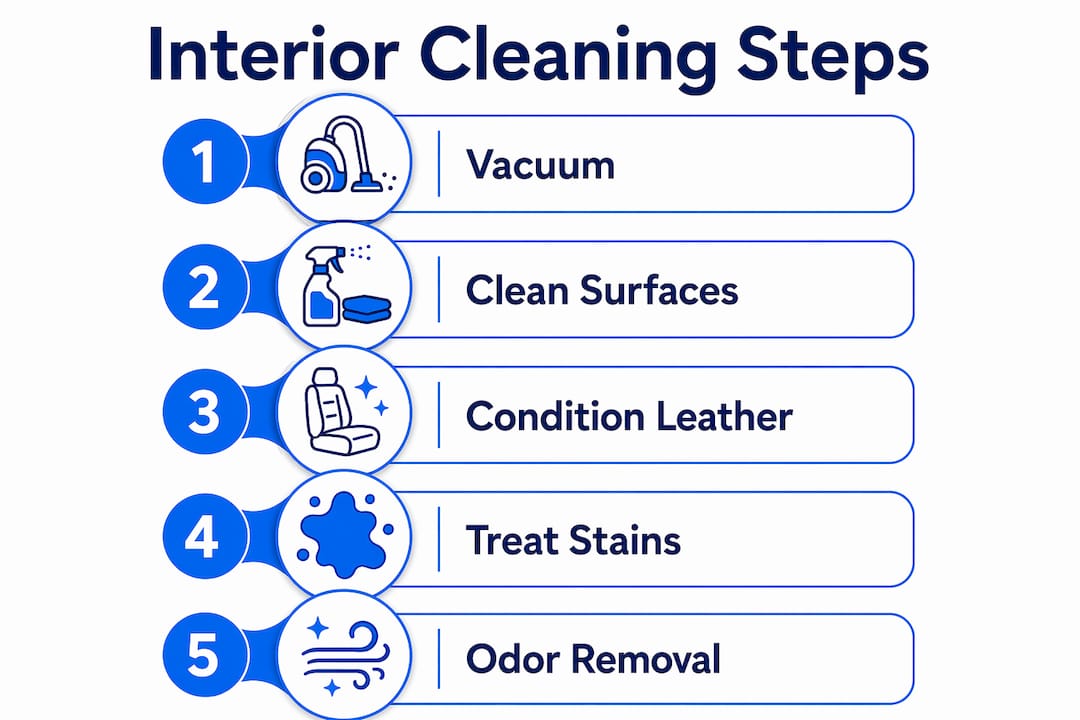
- Leather seats. Apply a pH-neutral leather cleaner to a soft brush and work in small sections. Wipe clean with a damp microfiber towel, then follow immediately with a leather conditioner.
- Fabric seats and carpets. Hot-water extraction removes embedded dirt that vacuuming cannot reach. For home use, a portable upholstery extractor achieves similar results on fabric seats. Vacuum first, extract second, then allow full drying before use.
Pro Tip: Keep moisture minimal on every surface except carpets and fabric seats. Wet cleaning on electronics-embedded dashboards in vehicles like the Mercedes-Benz S-Class or BMW 7 Series risks moisture intrusion into display panels.
How do you handle dye transfer, stains, and delicate finishes?
Dye transfer is the most mishandled problem in upholstery care for high-end cars. Dark denim transfers onto light-colored leather within minutes of contact. Treating dye transfer requires a test patch first, then cleaning from the edge of the stain toward the center using a dedicated leather cleaner. Working from the center outward spreads the dye further into the grain.
Blotting is the correct technique. Rubbing forces the dye deeper into the leather pores and causes permanent discoloration. Use a clean section of microfiber towel for each blotting pass. Immediate treatment matters. Delayed treatment of dye transfer allows the pigment to bond with the leather’s surface coating, making removal far harder.
For stains on fabric or alcantara, use a foam-based upholstery cleaner applied with a soft brush. Work in circular motions with light pressure, then blot dry. Never use heat to speed drying on alcantara. Heat sets stains permanently.
Common mistakes that cause irreversible damage:
- Using magic eraser pads on piano black or soft-touch matte plastics
- Spraying cleaner directly onto touchscreens or instrument clusters
- Using paper towels instead of microfiber on any surface
- Applying leather conditioner without cleaning first, which seals in dirt
- Using a steam cleaner on wood veneer or open-pore finishes
Pro Tip: For leather seat odor removal alongside stain treatment, address both issues in the same session. Odors trapped in leather grain resurface after cleaning if not treated separately.
What regular maintenance routine keeps luxury interiors factory-new?
A consistent maintenance schedule prevents the buildup that makes deep cleaning necessary. Experts recommend weekly dusting, monthly pH-balanced cleaning, and conditioning every 8–12 weeks. Skipping conditioning allows leather to dry out and crack, which no cleaner can reverse.
Follow this maintenance rhythm:
- Weekly. Dust all hard surfaces with a dry microfiber towel. Remove floor mats and shake them out. Vacuum seat crevices with a soft brush attachment.
- Monthly. Wipe all surfaces with appropriate pH-neutral cleaners. Clean glass inside and out. Treat any new stains or marks immediately.
- Every 8–12 weeks. Condition all leather surfaces with a matte-finish leather conditioner. Apply a plastic protectant to matte trim panels. Inspect wood veneer and aluminum for moisture damage or lifting edges.
- Seasonally. Deep clean carpets with hot-water extraction. Check door seals for dirt accumulation that transfers to door panels when closing.
Sun exposure accelerates interior degradation on every surface. Park in covered spaces when possible, or use a UV-blocking windshield shade. Direct sunlight fades leather dye, warps wood veneer, and causes matte plastics to develop a chalky surface texture over time.
For owners of vehicles like the Rolls-Royce Ghost, Bentley Continental, or Lamborghini Urus, the eco-friendly interior odor removal workflow complements regular cleaning by addressing embedded odors that surface cleaning cannot reach.
Key Takeaways
Cleaning luxury vehicle interiors correctly requires pH-neutral products, a top-to-bottom workflow, and a consistent maintenance schedule to preserve bespoke materials long-term.
| Point | Details |
|---|---|
| Use material-specific cleaners | pH-neutral products prevent etching on piano black, wood veneer, and leather. |
| Follow top-to-bottom order | Start at the headliner and finish at carpets to avoid recontamination. |
| Treat dye transfer immediately | Work edge to center and blot; rubbing spreads pigment deeper into leather grain. |
| Condition leather every 8–12 weeks | Regular conditioning prevents cracking that no cleaner can repair. |
| Avoid silicone-based dressings | Matte-finish conditioners preserve factory appearance without attracting dust. |
What I’ve learned after years of working inside luxury vehicles
The biggest misconception owners carry is that more product equals better results. The opposite is true. Oversaturating a surface, layering conditioners, or applying multiple cleaners in one session causes more damage than a light monthly routine ever would. Patience and restraint are the real skills here.
Owners of vehicles like the Porsche Panamera or Audi A8 often come to us after using a “premium” all-in-one interior spray they found at a car wash. Those products are formulated for volume, not for open-pore wood or semi-aniline leather. The damage shows up weeks later as a dull film or surface cracking that looks like age but is actually chemical residue.
The other thing I tell every owner: preservation beats restoration every time. A five-minute weekly dust-down prevents the kind of buildup that requires a $280–$300 full interior detail with odor treatment. That session takes 2–4 hours and still may not fully reverse neglect damage on delicate materials.
When a surface is beyond DIY care, call a professional who specializes in luxury interiors. General detailers trained on standard vehicles often use the same aggressive products and techniques on a Bentley that they use on a Toyota. The materials are not comparable, and neither are the consequences of getting it wrong.
— Master
Professional interior care from Masterodorremoval
Even a perfectly cleaned interior can hold odors that no surface wipe removes. Tobacco, pet, mildew, and food odors bond with foam, leather, and carpet fibers at a molecular level.
Masterodorremoval specializes in permanent odor elimination for luxury vehicles using green-certified, eco-friendly methods. No ozone. No chlorine. The process is safe for Nappa leather, alcantara, and every delicate finish inside a high-end cabin. Same-day and next-day appointments are available for owners who need fast results. For a complete interior refresh that goes beyond surface cleaning, professional odor removal from Masterodorremoval delivers a neutral, fresh cabin that matches the standard of the vehicle itself.
FAQ
What products are safe for cleaning luxury car interiors?
pH-neutral, material-specific cleaners are the only safe choice for luxury interiors. Household cleaners containing ammonia, bleach, or high alkalinity etch piano black, wood veneer, and aluminum trim.
How often should you condition leather seats in a luxury vehicle?
Condition leather seats every 8–12 weeks using a matte-finish conditioner. Skipping this schedule allows leather to dry out and crack, which cleaning products cannot repair.
What is the correct order for cleaning a luxury vehicle interior?
Start at the headliner and work down through windows, dashboard, doors, seats, and carpets. This top-to-bottom sequence prevents debris from upper surfaces recontaminating areas you have already cleaned.
Can you remove dye transfer from light-colored leather seats?
Yes, with immediate treatment. Apply a dedicated leather cleaner from the edge of the stain toward the center and blot with a clean microfiber towel. Rubbing spreads the dye and causes permanent discoloration.
When should a luxury vehicle owner hire a professional detailer?
Hire a professional when surfaces show chemical damage, deep staining, or persistent odors. Full interior detailing with odor treatment averages $280–$300 and addresses embedded contamination that DIY methods cannot reach.
Recent Comments